In this little tutorial we are going to take a trip back in time, back to the golden age of personal computing. A time when the ultimate computer was the Commodore Amiga and the latest kid on the block was wire-frame 3d graphics and polygon art. I am of course talking about the 1990’s and the glowing polygon effect.
If you really want a taste of just how fun the demo scene was back then, not to mention the amount of juice we old timers managed to squeeze out of a Motorola 68k processor (which is the same CPU that runs most washing machines today) then have a look at State of the art by Spaceballs. I remember watching this before going to school! Another of my favorite demos was Hardwired by The silents. To fully understand how awsome these demos are you have to remember that the CPU ran at 7 mhz and had 512 kb ram (chipset specs here).
Polygons are fun
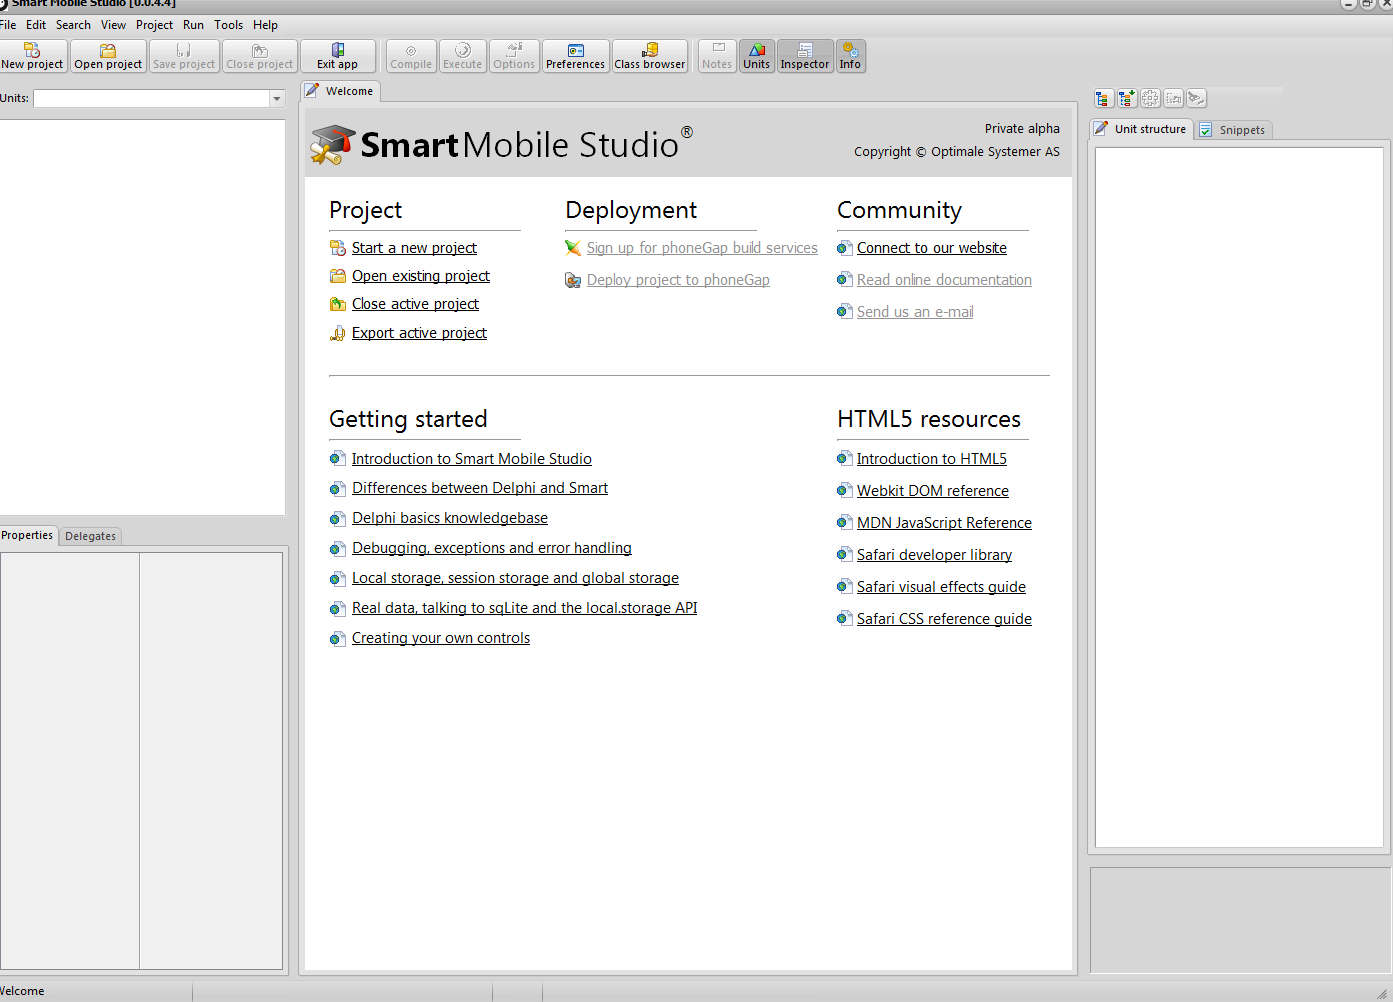
I was actually unsure if javascript would be able to cope with the glow effect, but it does so brilliantly even in full screen on my old iPhone 3Gs (and extremely smooth on the iPhone 4 and iPad 2). So let’s fire up Smart Mobile Studio (note: the pictures in this article is from an “in-house” version of Smart, which uses a Delphi XE2 skin – but everything else is the same as shipped with alpha release 4):
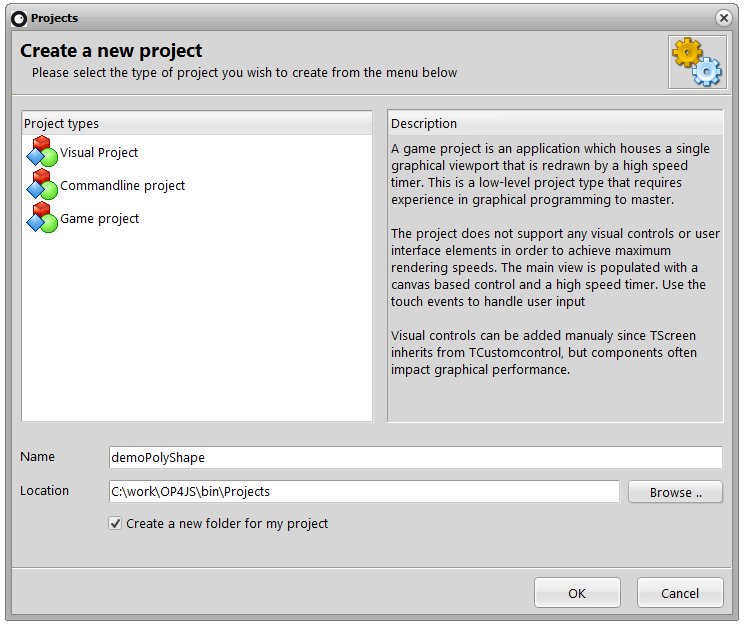
Next, click the new project button. Since this app uses graphics and have no buttons or other GUI elements select the game project type, give the project a name (demoPolyShape) and click OK:
Smart will now setup the project files for you. In this case you will have a single unit called demoPolyShape (if that is what you named the project). There are no forms or anything of the sort in a game project, but you can of-course create forms or GUI elements manually if you wish.
Polyshape
Polyshape is a routine that takes a circle and divides it between X number of points. So if you want a square shape, then you give it the value of 4. If you want a triangle you give it 3 (and so on). It also has a parameter for angle rotation – making it very easy to rotate the polygon as you wish. The code looks like this:
Procedure PolyShape(Canvas:TW3Canvas;Origo:TPoint;RH,RV:Integer;
          Angle:Float;N:Integer);
var
  mx,my,lp : integer;
  P0, P1: TPoint;
  xh, yh,
  c1, c2, c3,
  s1, s2, s3, p : float;
Begin
  if Canvas<>NIL then
  Begin
    if (N>=3) then
    Begin
      mx := Origo.x;
      my := Origo.y;
      p := 2*pi/n;
      c1 := cos(angle*pi/180);
      s1 := sin(angle*pi/180);
      c2 := cos(p);  s2 := sin(p);
      c3 := 1.0;     s3 := 0.0;
      P1.x := round(mx + rh*c3*c1 - rv*s1*s3);
      P1.y  := round(my + rh*s1*c3 + rv*s2*s3);
      for lp := 1 to N do
      begin
        p  := c3*c2 - s3*s2;
        s3 := s3*c2 + c3*s2;
        c3 := p;
        xh := rh*c3;
        yh := rv*s3;
        P0.x := round(mx + xh*c1 - yh*s1);
        P0.y  := round(my + xh*s1 + yh*c1);
        Canvas.LineF(P0.x,P0.y,P1.x,p1.y);
        Canvas.LineF(P1.x,p1.y,Origo.x,origo.y);
        P1 := P0;
      end;

    end;
  end;
end;
Rotation
Next, we want our polygon to rotate forever. So having pasted the above code into our project unit, we add a variable for angle into the application class:
  TApplication = class(TW3CustomGameApplication)
  private
    FAngle: float;
  protected
    procedure  ApplicationStarting; override;
    procedure  ApplicationClosing; override;
    procedure  PaintView(Canvas: TW3Canvas); override;
  end;
Ghost effect
Next we need to actually draw something on screen. But we want whatever is drawn to glow and fade away. This is done by clearing the screen completely – but using an alpha mask so that we slowly erase the pixels over a period of time. If we just blanked the screen then you would only see the current polygon shape. But we want to see previously drawn lines as well, fading out into oblivion:
procedure TApplication.PaintView(Canvas:TW3Canvas);
var
  wd,hd:  Integer;
Begin
  (* fill the background, but use the alpha channel to only
     appect pixels by 0.1 per refresh *)
  wd:=gameview.width;
  hd:=gameview.height;
  canvas.fillstyle:='rgba(0,0,99,0.1)';
  canvas.fillrectF(0,0,wd,hd);
end;
We also want to update the angle variable for each redraw so our polygon actually spins. So just below the above code we add the following:
  (* update the angle *)
  FAngle:=FAngle + 1;
  if FAngle>=359 then
  FAngle:=0;
It’s also nice to know how many frames we draw per second, so let’s use the built in methods to display that:
  (* Draw our framerate on the screen *)
  canvas.font:='10pt verdana';
  canvas.FillStyle:='rgb(255,255,255)';
  canvas.FillTextF('FPS:' + IntToStr(GameView.FrameRate),10,20,MAX_INT);
And finally, lets draw the polygon. But instead of forcing a redraw for each line we draw, we use the canvas API’s BeginPath and EndPath to draw them all with a single stroke (pun intended):
  (* draw the polygon *)
  canvas.BeginPath;
  canvas.StrokeStyle:='rgb(188,188,255)';
  PolyShape(Canvas,w3_point(wd div 2,hd div 2),
    wd div 2,wd div 2,FAngle,5);
  canvas.ClosePath;
  canvas.Stroke;
Now save your project and click the execute button and watch the 1990’s come to life 🙂
Note: The above demo runs at 80 FPS flat on my iPhone (120 on the iPad 2 and 130+ frames in Safari on the desktop). The above screenshot was taken with 20ms delay per redraw under 2 emulation layers (vmware and a chromium wrapper without hardware acceleration). If you adjust it to 1 (maximum) it runs much, much faster than the above text indicates (roughly 3 times faster).
The full sourcecode for this article
unit demoPolyShape;

interface

uses
  W3System, W3Ctrls, W3Application, W3Game, W3GameApp, W3Graphics,
  W3Components;

type
  TApplication = class(TW3CustomGameApplication)
  private
    FAngle: float;
  protected
    procedure  ApplicationStarting; override;
    procedure  ApplicationClosing; override;
    procedure  PaintView(Canvas: TW3Canvas); override;
  end;

implementation

//############################################################################
// TApplication
//############################################################################

procedure TApplication.ApplicationStarting;
begin
  inherited;

  //Initialize refresh interval, set this to 1 for optimal speed
  GameView.Delay:=20;

  //Start the redraw-cycle with framecounter active
  //Note: the framecounter impacts rendering speed. Disable
  //the framerate for maximum speed (false)
  GameView.StartSession(true);
end;

procedure TApplication.ApplicationClosing;
begin
  GameView.EndSession;
  inherited;
end;

Procedure PolyShape(Canvas:TW3Canvas;Origo:TPoint;RH,RV:Integer;
          Angle:Float;N:Integer);
var
  mx,my,lp : integer;
  P0, P1: TPoint;
  xh, yh,
  c1, c2, c3,
  s1, s2, s3, p : float;
Begin
  if Canvas<>NIL then
  Begin
    if (N>=3) then
    Begin
      mx := Origo.x;
      my := Origo.y;
      p := 2*pi/n;
      c1 := cos(angle*pi/180);
      s1 := sin(angle*pi/180);
      c2 := cos(p);  s2 := sin(p);
      c3 := 1.0;     s3 := 0.0;
      P1.x := round(mx + rh*c3*c1 - rv*s1*s3);
      P1.y  := round(my + rh*s1*c3 + rv*s2*s3);
      for lp := 1 to N do
      begin
        p  := c3*c2 - s3*s2;
        s3 := s3*c2 + c3*s2;
        c3 := p;
        xh := rh*c3;
        yh := rv*s3;
        P0.x := round(mx + xh*c1 - yh*s1);
        P0.y  := round(my + xh*s1 + yh*c1);
        Canvas.LineF(P0.x,P0.y,P1.x,p1.y);
        Canvas.LineF(P1.x,p1.y,Origo.x,origo.y);
        P1 := P0;
      end;

    end;
  end;
end;

// Note: In a real live game you would try to cache as much
// info as you can. Typical tricks are:
//   1: Only get the width/height when resized
//   2: Pre-calculate strings, especially RGB/RGBA values
//   3: Only redraw what has changed, avoid a full repaint
// The code below is just to get you started

procedure TApplication.PaintView(Canvas:TW3Canvas);
var
  wd,hd:  Integer;
Begin
  (* fill the background, but use the alpha channel to only
     appect pixels by 0.1 per refresh *)
  wd:=gameview.width;
  hd:=gameview.height;
  canvas.fillstyle:='rgba(0,0,99,0.1)';
  canvas.fillrectF(0,0,wd,hd);

  (* update the angle *)
  FAngle:=FAngle + 1;
  if FAngle>=359 then
  FAngle:=0;

  (* Draw our framerate on the screen *)
  canvas.font:='10pt verdana';
  canvas.FillStyle:='rgb(255,255,255)';
  canvas.FillTextF('FPS:' + IntToStr(GameView.FrameRate),10,20,MAX_INT);

  (* draw the polygon *)
  canvas.BeginPath;
  canvas.StrokeStyle:='rgb(188,188,255)';
  PolyShape(Canvas,w3_point(wd div 2,hd div 2),
    wd div 2,wd div 2,FAngle,5);
  canvas.ClosePath;
  canvas.Stroke;
End;

end.


