In this installment of our graphics tutorial we will be covering alpha blending (opacity) for controls and images, and also how to load images via code into your Smart applications. If you haven’t read the previous articles they can be found here:
There are also plenty of examples in the documentation, here (see bottom of page) that will get you up and running quickly.
What is alpha blending?
Alpha blending is a technique for blending pixels together using, as the name implies, the alpha channel. Pixels stored in 32bit format uses 3 bytes for red, green and blue – with the final byte reserved for opacity, called the alpha channel. When you see semi transparent graphical effects, it’s alpha blending you are seeing.
Alpha blending under javascript has very good support. Since the DOM is very large and there are many combinations in which you can apply effects – ther scenarios where you can apply opacity are nearly endless, but in short we can say that:
- Controls can be alpha blended (buttons, panels, images – anything based on TW3CustomControl)
- Images can be alpha blended (TW3Image)
- Generated canvas graphics can be alpha blended (to some extent)
Opacity for controls
To alter the opacity for any Smart Mobile component, simply set the Boolean Alphablend property to true and alter the opacity property. It is very easy to fade in a panel or form using a timer this way.
If you want cutting edge effects you probably want to use the GPU powered CSS transitions (see W3Animation.pas). If you want really cool and really fast graphics where you dont need to use the canvas – have a look at sprite3d.pas which ships with our RTL. The demo “spartacus” in the demo folder was created using this API. Sprite3d uses hardware acceleration to move normal DIV based components around the display very, very quickly.
Opacity for images
TW3Image is a control, so the same rules that apply to controls in general – applies to TWImage. You can also use images when drawing to a canvas. When you draw images to a canvas you can use the canvas’s globalalpha and globalcompositionoperation property to control how the pixels are copied.
Opacity for canvas graphics
When copying pixels from one canvas to another there are special rules. In order for the globalcompositionoperation and globalalpha properties to have any effect you have to use the drawimage method – but with the handle of the source canvas as a parameter. This means that blindly using putimagedata wont have the desired effect.
Loading pictures
Enough theory, let’s start by learning how to load a picture and display it. You can either use the designer and place a TW3Image component on your form, or create it via code. In this example we are going to do it the easy way by writing the code directly. So fire up smart mobile studio, create a new visual component project, switch to the source-code for Form1 and let’s get cracking.
Before you start to code you need to add an image to your project. If you right-click on the project tree-view (top-left in the IDE) and select “add resource file” from the pop-up menu you can load in any html compatible image. In my example I have added a picture called “chrome.png”.
Start by adding a field to the form class. I simply called it “FImage” (somehow prefixing variables and fields with F has stuck with me):
  TForm1=class(TW3form)
  private
    {$I 'Form1:intf'}
    FImage: TW3Image;
  protected
    procedure InitializeObject; override;
    procedure FinalizeObject; override;
    procedure StyleTagObject; reintroduce; virtual;
    procedure Resize; override;
  end;
Next, we initialize the image object and load in an image. I have set the onLoad event to display a messagebox when the image is ready for use.
procedure TForm1.InitializeObject;
begin
  inherited;
  {$I 'Form1:impl'}
  FImage:=TW3Image.Create(NIL);
  FImage.OnLoad:=procedure (sender:TObject)
    Begin
      showmessage('image ready for use');
    end;
  FImage.LoadFromURL('res/chrome.png');
end;
It’s important to know that javascript is a non-blocking language. When you issue a LoadFromURL command, the actual loading takes place in the background – and your application continues. So you always have to check if the image is ready for use before you can actually work with it.
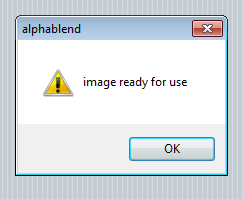
When you run the application you should get a messagebox telling you that the image is ready for use:
In a real life application what you want to do is to create a counter with the total amount of images you need to load, use a loading form and then wait until all pictures are loaded before you proceed to the actual main-form.
Setting a background
All Smart Mobile Studio controls which are based on TW3CustomControl have a background property object. Using the methods of this object you can easily change the background of any control.
We can, for instance, alter the code above to the following:
procedure TForm1.InitializeObject;
begin
  inherited;
  {$I 'Form1:impl'}
  FImage:=TW3Image.Create(NIL);
  FImage.OnLoad:=procedure (sender:TObject)
    Begin
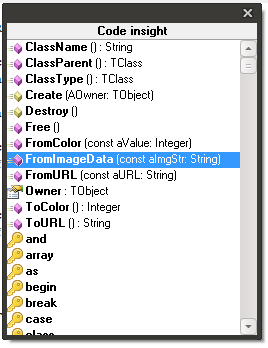
      Background.FromURL(FImage.toDataUrl);
    end;
  FImage.LoadFromURL('res/chrome.png');
end;
Using CSS to help with fading
CSS have gained a lot of ground for the past couple of years. If you havent read about it’s latest features then you should head over to apple and catch up. One of the coolest features is GPU powered graphics, transitions and effects. You can also add “tweening” to most CSS properties. This means that you can add a delay and in-between effect whenever a value changes.
Take for instance the opacity property. Let’s say you want to add a delay whenever you alter the opacity, creating a fading effect. Under Smart Mobile Studio this is very simple to achieve:
procedure TForm1.InitializeObject;
begin
  inherited;
  {$I 'Form1:impl'}
  FImage:=TW3Image.Create(self);
  FImage.setbounds(10,10,200,200);
  FImage.OnLoad:=procedure (sender:TObject)
    Begin
      w3_setstyle(FImage.Handle,'-webkit-transition','opacity 0.5s ease-in'); //webkit
      w3_setstyle(FImage.Handle,'transition','opacity 0.5s ease-in'); //mozilla
      FImage.AlphaBlend:=True;
    end;
  FImage.LoadFromURL('res/chrome.png');
end;
Creating a fade in/out effect is thus as easy as adding a button, and setup an event handler with the following:
  w3button1.onclick:=
    procedure (sender:Tobject)
    begin
      if FImage.opacity>0 then
      Begin
        FImage.opacity:=0;
        writeln('fading out');
      end else
      Begin
        FImage.opacity:=255;
        writeln('fade in');
      end;
    end;
You can create some very interesting effects with CSS technology. In the demo below we used sprite3d (w3sprite3d.pas in our RTL) to create a little summer holiday card. You can find the source-code for this demo in the smart mobile studio demo folder:
Using images with the canvas
Strictly speaking, you don’t need to use the canvas object in order to create a game or a multimedia application. You will actually get better results in many cases using our Sprite3d implementation – which uses hardware accelerated GPU power to move stuff around the screen. But there are naturally cases where the canvas is more appropriate, depending on what you want to achieve of-course.
To draw images to the canvas you use the methods:
- DrawImageF
- DrawImage
- PutImageData
Both versions of DrawImage takes an image handle as a parameter (FImage.Handle) and can be used to “blit” (copy) an image onto the canvas. You control the copy operation using the GlobalCompositionOperation property.
PutImageData is a bit different, in that you have to provide a TW3ImageData object as a parameter. TW3Image (as well as the TW3Canvas object itself) has a method called toImageData which returns a DIB (device independent bitmap). This is a low-level class which also contain methods for directly manipulating the pixel values (R,G,B,A). If you have static pictures that you use a lot in your app then you may want to cache them as TW3ImageData objects for faster drawing.
Final installment
In the next and final installment we will have a look at Sprite3d, which is a very famous javascript library for fast hardware accelerated graphics. Instead of wrapping it we decided to implement it from scratch in Smart Mobile Studio pascal, which not only made it faster but also much easier to use. So stay tuned for the last article.
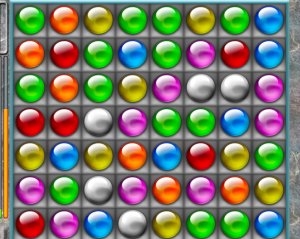
In the meantime have a look at what other people are creating with Smart Mobile Studio: Gem Master Demo


Is it possible to do palette cycling with SMS? That would be cool for old-school demos 🙂
Check out the plasma project in the demo folder :))
Thanks Jon 🙂
SMS rules, and so do you guys! 😀