
Double Dragon on the Amiga 1989
When I was a kid I used to play tons of games on my Commodore 64 machine. This was the number one gaming machine of the early 80’s and was only surpassed by the Commodore Amiga in the late 80’s early 90’s in terms of popularity. The reason these machines were so popular was not just the games you could play on them, but also the fact that you could make your own games and applications on the same machine. They were not like the PlayStation or the xbox of our days – which turns brilliant children into customers only, with no means of playing with the device and exploring what it means to create.
Needless to say, while I loved to play games as a kid, by the time i made it to high-school i was more interested in how games were made. I started toying around with basic programming quite early, and I can still remember the day i decided to learn how to program. I had been trying to create a scroll text (a text that rolls over the screen) but it didn’t work. For a whole day i kept working on it. I was about to give up and forget the whole programming thing, but I made a decision – and before i knew it the problem was solved. And I haven’t been to soccer practise since..
Return of the platformers
The games of the 80’s and 90’s had a specific look and feel to them. They were restricted of-course, due to lack of memory and the speed of the CPU – but due to these very restrictions programmers had to come up with clever methods to manage landscapes and effects that went beyond our expectations. What is really cool right now in the mobile gaming industry – is that the display, processor and memory capabilities of gadgets like iPhones and ipads, are similar to those of the past in terms of situation. Some games are better suited than others when it comes to mobile entertainment. Considering that the average time spent playing a game on a mobile device is somewhere between 3-15 minutes, a quick platform game makes more sense than say, a civilization clone. And it just happens that the hardware, size of display (et al) is likewise in the ballpark of what we had to work with under the Amiga and Atari machines.
Turrican-2
The standard Amiga display in pixels for gaming was something like 320 x 256 pixels (32 colors per scanline), while a non-retina iPhone is 480 x 320. The iPhone4 can display 960 x 640 pixels – and the iPhone 5 handles 1136 x 640 pixels. But naturally you don’t have to match the exact display size of the device, you can set the scaling of the display via CSS and the hardware will stretch the graphics to fill the screen. This can actually be made to be a bonus rather than a disadvantage (retro feel, some jagged edges etc).
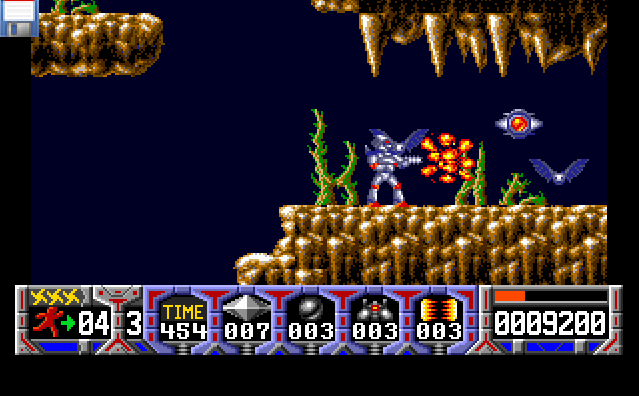
In this gaming tutorial we will be looking at how to create a platform / shoot’em up game. If you have ever played Super-Mario before Nintendo went 3d, then you know what a platform-game is (jumping around platforms), and a shoot’em up is typically you controlling a spaceship or airplane through a landscape.
The reason i will write about both game types is because they deploy more or less the same technology. They both use tiles (chunks of graphics) to present and navigate a game world or map, they both use pre-defined enemy behavior or paths (and naturally we can make smarter enemies that hunt you down, using algorithm’s like A*). And, just to throw it in there, a plot and storyline which rarely excludes you having to save the universe or a damsel in distress – all by yourself from the evil clutches of aliens or megalomaniac despots.
Tile and map based games

Mario on the SNES, the #1 tile based game
If you ever played Nintendo or owned an Amiga as a teenager, you may remember how these two particular game-types (platformers and shoot-em-ups) were sort of rugged in their design. While the graphical impression housed round-corners and spiffy animations, the general feel and layout was that of square tiles. Small pieces of graphics, usually 32×32 pixels in size (or less) which was re-used over and over again to form a map – or game level. So you don’t have to draw 1000 different trees, you draw one tree and then re-use that over and over again.
Well this is how game maps of that genre is made. Behind the scenes you have an array of integers – representing the total width and height of the map. And in each array item you have the number for the graphical tile or block that should be drawn there. In Delphi we are used to image lists, and we assign the image number to a button or action-object at design-time. This is exactly the same thing – except that the numbers are read from a larger array and drawn very quickly onto the screen.
So, how do we go about creating such a map – and where can we get some graphics to play with?
Tools of the trade
Right. What we need is a good map editor, one that can export your level designs as JSON format. We also need some graphics to play with that doesn’t violate some ancient copyright law. You may find it surprising, but a lot of old companies actually guard games as far back as the 1980’s to this day. A co-worker of mine got an email from Atari about his remake of a classical 8bit shooter. And while we love Atari as a company, we were a bit surprised that they actually noticed such an anonymous re-make. So in short: try to avoid using graphics and names that have been used before. And if you do – ask the copyright holder for permission.
Thankfully, there are a few places where you can get some free tile-sets and game graphics.
If you want to really get into the industry of game and entertainment then you want to visit Gamasutra and get a feel for the community. And you will discover as you explore the tools, that Smart Mobile Studio really gives you a lot out of the box. Pascal with anonymous functions is light-years ahead of pure javascript.
And last but not least we need a good editor. One that is easy to use and which can export to JSON format, which javascript can use directly. In this case there is no better editor than Tiled, which you can download for free right here.

Tiled map editor
Using javascript cleverly
All languages and environments have their positive and negative sides. The downside of javascript is, naturally, that you are at the mercy of the rendering engine (which on most mobile devices is webkit) and also the provider’s policy for translated code. In plain English: if you code is to complex or to slow, the operating system will either drop your app as non-responsive, or it simply wont be playable. Either way you have to watch out just how many elements you throw into the mix – because there are so many different devices and configurations out there, and just because things work on your phone doesn’t mean it works for everyone.
I want to mention a small trick I use straight away. I write this as “theory” only, just throwing the idea out there for anyone to play with: HTML5 has this amazing new feature, namely hardware accelerated CSS. Which means that you can get the GPU (graphical processing unit) to do the work for you (which is what the sprite3d.pas unit is all about. See the demo-folder/spartacus.opp). So instead of manually scrolling the pixels of a bitmap of DIB like we would under native Delphi, scanline by scanline – we can cheat and draw the whole map (if it’s not to large) onto an offscreen bitmap – then use that bitmap as a background for a normal DIV control. Scrolling is then just a matter of changing the X and Y position of the control’s CSS rather than brute-force pixel manipulation. Just throwing this out there. It is a method worth keeping in mind.
Loading a map
Having covered some bare-bone concepts of what a tile-based, map oriented game is and how it all works, let’s get our hands dirty with some code. We are going to start by creating a map-loader class that can extract the tile-numbers from a map designed using Tiled (see link above). Before we start, make sure you have the following:
- Download the Tiled map editor
- Download this tileset picture (same as below)
- Create a new Smart Mobile Studio game project
The tileset we use in our example was published on OpenGameArt.com and is GPL.
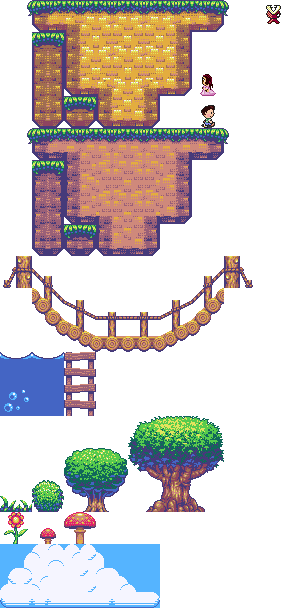
Tutorial tileset
Right, let’s talk a bit about the map data-format. A map can contain the following information:
- Layers (think photoshop layers, but with tiles instead of pixels)
- Terrain information per tile (solid, water.. you define what is what)
- Polygon shapes (arrows, boxes, stuff that spices up your scenes)
- Objects (a shape that is made from several tiles, like a house etc., think of it as a “brush”)
- Tileset filename and origin
- Misc technical information
We dont really need all of this, so I decided to create a very simple – straight forward one-layer map loader. It loads in the JSON map using Smart Mobile Studio’s TW3HttpRequest object, parses it, extracts width and height and also the data for the first layer. The code is so simple it should be a breeze to expand on it for better support of features. Okej, let’s have a look!
  TMapData = Class(TObject)
  private
    FWidth:     Integer;
    FHeight:    Integer;
    FData:      Array of Integer;
    FLoader:    TW3HttpRequest;
    FOnReady:   TNotifyEvent;
    Procedure   HandleMapFileLoaded(sender:TW3HttpRequest);
    function    getDataItem(x,y:Integer):Integer;
  public
    Property    Width:Integer read FWidth;
    Property    Height:Integer read FHeight;
    Property    Data[x,y:Integer]:Integer read getDataItem;
    Procedure   ParseFrom(aJSONFileData:String);
    Procedure   LoadFrom(aURL:String);
    Constructor Create;virtual;
    Destructor  Destroy;Override;
  published
    Property    OnReady:TNotifyEvent read FOnReady write FOnReady;
  End;

  //##########################################################################
  // TMapData
  //##########################################################################

  Constructor TMapData.Create;
  Begin
    inherited Create;
    (* Create our HTTP loader, used for loading data *)
    FLoader:=TW3HttpRequest.Create;
    FLoader.OnDataReady:=HandleMapFileLoaded;
  end;

  Destructor TMapData.Destroy;
  Begin
    FLoader.free;
    inherited;
  end;

  function TMapData.getDataItem(x,y:Integer):Integer;
  var
    mIndex: Integer;
  Begin
    mIndex:=(y * FWidth) + x;
    result:=FData[mIndex];
  end;

  Procedure TMapData.LoadFrom(aURL:String);
  Begin
    (* load level data *)
    try
      FLoader.get(aURL);
    except
      on e: exception do
      showmessage(e.message);
    end;
  end;

  Procedure TMapData.ParseFrom(aJSONFileData:String);
  var
    mMapData: Variant;
    mRaw: Variant;
    x:  Integer;
    mLen: Integer;
  Begin

    asm
      @mMapData = JSON.parse(@aJSONFileData);
    end;

    FWidth:=mMapData.width;
    FHeight:=mMapData.height;
    mRaw:=mMapData.layers[0].data;

    mLen:=FWidth * FHeight;
    FData.SetLength(mLen);
    for x:=0 to mLen-1 do
    FData[x]:=TVariant.asInteger(mRaw[x]);
  end;

  Procedure TMapData.HandleMapFileLoaded(sender:TW3HttpRequest);
  Begin
    (* parse map data *)
    ParseFrom(sender.responsetext);

    if assigned(FOnReady) then
    FOnReady(self);
  end;
Now that we have some code for loading a map, we can give it a test-drive. But we also need to match the numbers from our map with the graphics of our tileset. So we need a class which turns a tile number into a piece of graphics. And it goes a little something like this:
  TW3Tileset = Class(TObject)
  private
    FImage:     TW3Image;
    FReady:     Boolean;
    FColumns:   Integer;
    FRows:      Integer;
    FTotal:     Integer;
    FWidth:     Integer;
    FHeight:    Integer;
    FOnReady:   TNotifyEvent;
    procedure   HandleImageReady(sender:TObject);
    Procedure   setWidth(aValue:Integer);
    procedure   setheight(aValue:Integer);
    Procedure   ReCalcInfo;
  public
    Property    OnReady:TNotifyEvent read FOnReady write FOnReady;
    Property    SpriteWidth:Integer read FWidth write setWidth;
    Property    SpriteHeight:Integer read FHeight write setHeight;
    Property    Ready:Boolean read FReady;
    Procedure   LoadImage(aUrl:String);
    Procedure   Draw(Canvas:TW3Canvas;dx,dy:Integer;FrameIndex:Integer);
    Constructor Create;virtual;
    destructor  Destroy;Override;
  End;

  //##########################################################################
  // TW3Tileset
  //##########################################################################

  Constructor TW3Tileset.Create;
  Begin
    inherited Create;
    FWidth:=32;
    FHeight:=32;
    FColumns:=0;
    FRows:=0;
    FTotal:=0;

    FImage:=TW3Image.Create(NIL);
    FImage.OnLoad:=HandleImageReady;
  end;

  destructor TW3Tileset.Destroy;
  Begin
    FImage.onLoad:=NIL;
    FImage.free;
    inherited;
  end;

  Procedure TW3Tileset.setWidth(aValue:Integer);
  Begin
    FWidth:=TInteger.ensureRange(aValue,4,MAX_INT);
    ReCalcInfo;
  end;

  procedure TW3Tileset.setheight(aValue:Integer);
  Begin
    FHeight:=TInteger.ensureRange(aValue,4,MAX_INT);
    ReCalcInfo;
  end;

  Procedure TW3Tileset.ReCalcInfo;
  Begin
    if FReady then
    Begin
      FColumns:=FImage.Width div FWidth;
      FRows:=FImage.Height div FHeight;
      FTotal:=FColumns * FRows;
    end else
    Begin
      FColumns:=0;
      FRows:=0;
      FTotal:=0;
    end;
  end;

  procedure TW3Tileset.HandleImageReady(sender:TObject);
  Begin
    FReady:=True;
    ReCalcInfo;
    if assigned(FOnReady) then
    FOnReady(self);
  end;

  Procedure TW3Tileset.LoadImage(aUrl:String);
  Begin
    FReady:=False;
    ReCalcInfo;
    FImage.LoadFromUrl(aUrl);
  end;

  Procedure TW3Tileset.Draw(Canvas:TW3Canvas;
            dx,dy:Integer;FrameIndex:Integer);
  var
    sx,sy:  Integer;
  Begin
    if  FReady
    and assigned(canvas)
    and (FrameIndex>=0)
    and (FrameIndex<FTotal) then
    Begin
      sy:=FrameIndex div FColumns;
      sx:=FrameIndex - (sy * FColumns + 1);
      sx:=sx * FWidth;
      sy:=sy * FHeight;
      canvas.DrawImageF(FImage.Handle,sx,sy,FWidth,
      FHeight,dx,dy,FWidth,FHeight);
    end;
  end;
Ok. Let’s glue the logical to the visual and give this puppy a quartex. We want to read from the map and then translate that into graphics on the screen. Just to get some pixels into our display we start off very simple:
procedure TApplication.PaintView(Canvas: TW3Canvas);
var
  wd,hd:  Integer;
  x,y:  Integer;
begin
  // Clear background
  Canvas.FillStyle := 'rgb(0, 0, 99)';
  Canvas.FillRectF(0, 0, GameView.Width, GameView.Height);

  // Draw our framerate on the screen
  Canvas.Font := '10pt verdana';
  Canvas.FillStyle := 'rgb(255, 255, 255)';
  Canvas.FillTextF('FPS:' + IntToStr(GameView.FrameRate), 10, 20, MAX_INT);

  if FTileset.Ready then
  Begin

    try
      wd:=display.Width div 32;
      hd:=display.height div 32;

      for y:=0 to hd do
      Begin
        for x:=0 to wd do
        FTileset.Draw(canvas,x*32,y*32,FMapData.data[x,y]);
      end;

    except
      on e: exception do;
    end;
  end;
end;
Hit F9 and we get the following result:
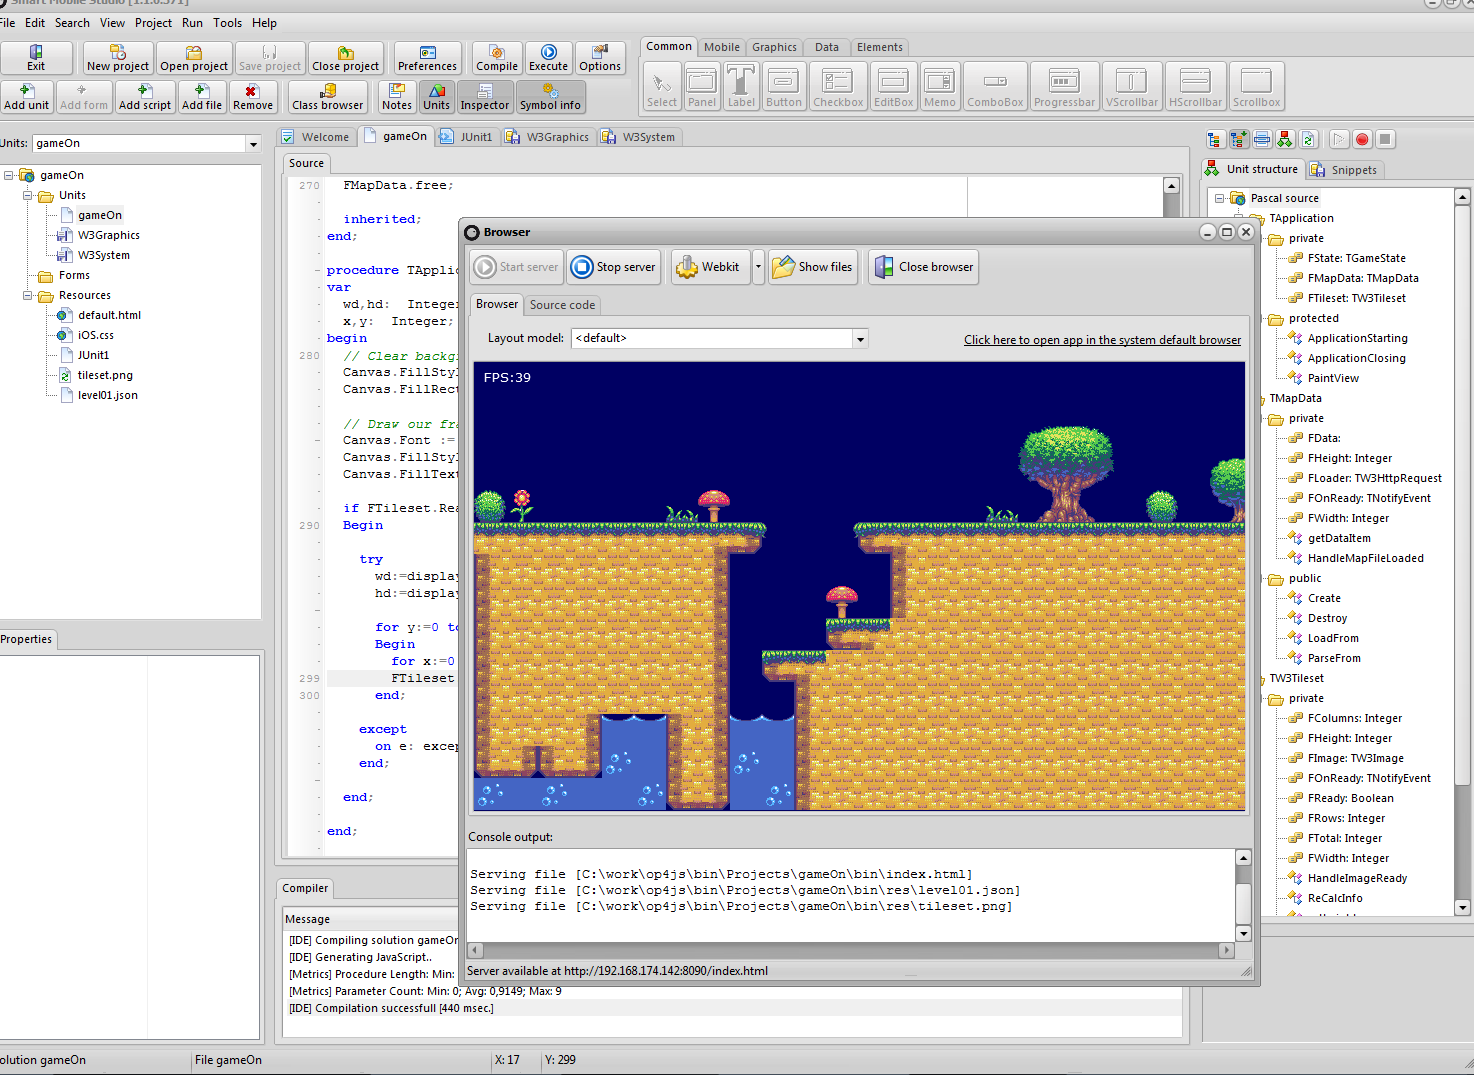
Our humble map drawn onto the canvas
Next article
In this article we have covered some basic concepts regarding tile-based games. We have created a loader class for the map-files and a tileset manager to render the graphics. In the next article we will make things scroll around and also try to optimize the drawing of tiles and elements.
You can download the project file for this article here: gameOn