Smart Mobile Studio
  • News
  • Forums
  • Download
  • Store
  • Showcases
    • Featured demos
    • The Smart Contest 2013, Round 1 – Graphics
  • Documentation
    • Get the book
    • System requirements
    • Prerequisites
    • Getting started
      • Introduction
      • Application architecture
      • The application object
      • Forms and navigation
      • Message dialogs
      • Themes and styles
    • Project types
      • Visual project
      • Game project
      • Console project
    • Layout manager
    • Networking
      • TW3HttpRequest
      • TW3JSONP
      • Loading files
  • About

Category Archives: Documentation

Tutorial, iOS, Android, Graphics, Games, CSS, Animations, HTML5, Javascript, General programming

Partial classes, the smart way

Posted on 25.10.2016 by Jon Lennart Posted in Developers log, Documentation, News

Smart Mobile Studio have had support for partial classes for quite some time. It’s already an integral part of our run-time library and brings invaluable features to how we extend and work with the base system. But for those new to this concept, a short introduction is in order.

What is a partial class?

A partial class is, essentially, that you divide the implementation of a class into smaller pieces. These pieces can reside in the same unit or across multiple units of your codebase. When the compiler encounters a class marked as partial, it will wait until the compilation is complete before it seals the virtual method table for that class.

That sounds very technical, but it’s really super easy to use and you dont have to get into the nitty-gritty of things to take advantage of the fantastic new abilities it gives you.

You may ponder what on earth is the use for something like this? Well, first of all it allows you a finer grain of control when dealing with multi-platform support. Let’s say you have some code that you need to work on both visual (SmartCL namespace) client applications and server-side (node.js) as well. Naturally SmartCL depends on the document object model (DOM) being present, but under node.js there is no such thing. If you try to use the units prefixed with SmartCL.* under node.js, it will either crash the server or produce some spectacular access violations.

With partial classes you can solve this quite elegantly by putting the base-class in one unit, and then finish the class in separate units: one for browser-based code and the other for node.js based environments.

Extending functionality

But the power of partial classes is not really in organization. The above example could just as easily be solved with some clear-cut compiler defines. Not as elegant, but just as effective. The real power is in how partial classes can extend any class which is defined as partial. Like TW3CustomControl, which is the foundation for all visual controls.

Let’s say you want to add a function for fading out any control. Not just a single control, but all controls (since all visual control inherit from TW3CustomControl, any addition to that class affects all descendants equally). If you take a look at the class (which is found in SmartCL.Components.pas) you will notice that it’s marked as partial.

  TW3CustomControl = partial class(TW3MovableControl)
  ..
  ..
  end;

That means that we can extend the class at any time. So if we add the following code to one of our units:

type
  TW3CustomControl = partial class(TW3MovableControl)
  public
    procedure FadeOut;
  end;

procedure TW3CustomControl.FadeOut;
begin
  // Add code here
end;

Hit compile so the compiler picks up on this, and voila – the code suggestion will now show the new member FadeOut() for all controls. Every control that inherits from TW3CustomControl gets this new member. That is pretty cool! You could ofcourse do something similar with a class helper (which Smart Mobile Studio also supports), but the difference between a class-helper and a partial class is quite radical.

A class helper is not a true member of a class, it’s more (as the name implies) a helper that operates around an instance. But a partial class is the class itself, with full access to protected and private members. You have just told the compiler that “oh by the way, add this to TW3CustomControl”. Any class defined as partial will not have it’s VMT sealed until the very last moment.

Need to extend that websocket client you find lacking? Well, if it’s marked as partial you can extend the class as you see fit without messing about with the RTL. It’s also a good way to extend the copyrighted RTL with new features that can be sold and distributed as a package. You wont violate anything because you are using partial classes!

Incidentaly this is how Mono C# solved the problem of targeting Android and Apple iOS from the same codebase. We have done more or less the same in our upcoming RTL where we introduce 3 distinct namespaces. So there is a lot of goodies in the bag for x-mas 🙂

Effects

If you add the unit SmartCL.Effects.pas to your project you will notice something very cool! Namely that TW3CustomControl suddenly get’s around 30 new members. These are special effects methods that will help you write some truly amazing controls. Want a button to shake when the user touches it? No problem. Want a panel to fade out, or perhaps slide off to the right? Easy as apple pie. Just open up SmartCL.Effects.pas and have a look. You can even daisy-chain effects to each other (with callbacks and duration settings) and Smart will execute them in sequence (!)

Verdict

I hope this introduction to partial classes was helpful and that it enriches the way you write Smart solutions. Naturally there is more than one system for partial classes on the market. C# has a slightly different take on this technology. But personally and speaking from experience (I have worked quite a lot with Mono C#) I feel our variation on the theme is better. You have to type more in C# to achieve what Smart does in a couple of lines, and the level of control you have is just awesome.

And ofcourse: It makes it that much easier to deal with multi-platform code, which is what our next updates is all about.

Using DataSnap Importer to Work with Datasets

Posted on 10.01.2015 by gabr42 Posted in Documentation, News

Last time we looked at how Smart can be used to write a client for a REST server, written in Delphi. This time we’ll see how we could use this approach to work with datasets.

In theory, it should be possible to write a client which works seamlessly with datasets, just like Delphi does when you use a “normal” DataSnap server. In practice, however, even Delphi’s own clients don’t support this with REST servers in versions up to XE6. Only in XE7 a better support for sending FireDAC datasets over REST was added, but this is not yet supported in Smart. So for the time being you will have to do some manual work and write some dataset-wrapping code on the server (and also on the client).

Continue reading→

Using DataSnap Connector Importer

Posted on 20.12.2014 by gabr42 Posted in Documentation, News

This tutorial shows how to use DataSnap connector in the Smart Mobile Studio Enterprise.

Server

Firstly, create a DataSnap server. In this example we are using Delphi XE7 but any older version will be OK as long as it can create a REST server.

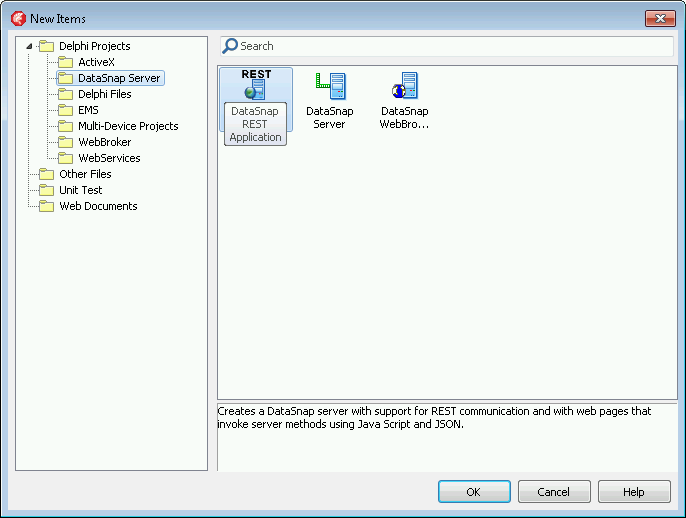
Start by creating new project. Select DataSnap REST Application from the DataSnap Server branch. It is important to create REST server as Smart doesn’t work with binary data format used in MIDAS-based DataSnap server.

Create DataSnap REST server

Continue reading→

Writing REST Clients with Smart 2.1.2

Posted on 14.12.2014 by gabr42 Posted in Documentation, News

Besides a bunch of fixes, Smart 2.1.2 introduced a new unit, SmartCL.Inet.REST. This unit greatly simplifies writing REST clients in Smart. A simplest way to introduce it is with an example.

Introduction

Let’s say we have a REST server listening at http://someserver/hbbtv/streamevents. It supports one request – PUT – and three parameters – applicationid, eventid, and eventdata. To send a request, one would just open a HTTP connection (TW3HttpRequest would do that for you in Smart) and send something like http://someserver/hbbtv/streamevents/applicationid=1&eventid=233&eventdata=Test (or http://someserver/hbbtv/streamevents/1/233/Test if your REST server is not completely braindead). Still, you would have to set up the TW3HttpRequest object, concatenate the URL and parse the response. And whenever you write some code, there’s an opportunity to introduce a bug so it’s best if you code as little as possible.

The REST client for the example above can be written in one statement.

REST['someserver', '/hbbtv/streamevents']
  .Get([1, 233, 'Test'])
  .OnDone(lambda (http) Log('Event sent'); end)
  .OnError(LogHttpError);

Continue reading→

Working with the grid component (part 3)

Posted on 18.02.2014 by Bojan Nikolic Posted in Developers log, Documentation

Working with footer

Beside Column’s headers, you may show footer cell for each column. In footer you may place simple text, or you may show result of formula.

Footers are not visible by default. To show footers set ShowFooter property of W3Grid to True.

To access Column’s footer object, use Footer property of Column. Header and Footer both share same ancestor and properties such as Caption can be found in Footer too.

Continue reading→

Grid tutorial

Working with the grid component (part 2)

Posted on 13.02.2014 by Bojan Nikolic Posted in Developers log, Documentation 1 Comment

In this article we will further explain every part of working with W3Grid. Make sure to read Part 1 before reading this article.

Continue reading→

Grid tutorial

Working with the grid component (part 1)

Posted on 10.02.2014 by Bojan Nikolic Posted in Developers log, Documentation 2 Comments

Smart Mobile Studio 2.0 introduced an important visual component – a grid. As its use is not obvious, we have prepared a series of articles which will introduce the component and demonstrate the usage. Articles are written by the author of the grid component, Bojan Nikolic (Berg Soft).

In this article we’ll cover the most basic steps in grid usage.

  1. Placing W3Grid on a form
  2. Adding columns and setting column properties
  3. Adding rows and filling cells with data

Continue reading→

Grid tutorial

Server-side Node.js (part 1): Introduction

Posted on 04.01.2014 by AndreM Posted in Documentation, News

Node.js Logo

In the new version 2 of Smart Mobile Studio you can now create server side projects! This is possible by using node.js, which is “the next big thing”: It’s an event based server side JavaScript application using the open source and very fast Google’s V8 engine. It was initially developed to be used as a HTTP server in the cloud, but nowadays you can also use it on your own PC or on a business server. It is powered by a small executable (6 MB)V8_JavaScript_engine_logo which doesn’t need an installation. Still, it can be extended easily via the package manager npm to fulfill any desired purpose and make it versatile in a lot different situations. For example, it is used by LinkedIn, WalMart and even Microsoft(!) in the Azure cloud. Also, PayPal has recently switched from Java to Node.js…
When you start using node.js, be aware that it is very different to web browser programming: it is a server with no GUI, so no ‘document’ and ‘window’ globals and no ‘alert’ function. It doesn’t run in a sandbox so you access all files, databases etc like you can with a normal application. It has it’s own API for this, which cannot be compared to “JavaScript for HTML”: it is just JavaScript and has nothing to do with web browsers.

But be aware: it is fun and addictive! 🙂

Continue reading→

Smart Mobile Studio 1.1.2 beta

Posted on 03.07.2013 by Smart Mobile Studio Team Posted in Developers log, Documentation, News 2 Comments

Just before the first round of summer holidays we managed to put together a beta version of the next Smart Mobile Studio, version 1.1.2. Installer is available on the download page (link removed, since beta 2 is ready).

Installation

In case you are using the snippets functionality of the Smart Mobile Studio, you should first make a backup copy of the snippets file, because the installer will silently overwrite it with a fresh version. (Yes, this is a bug. Yes, we will fix it.) Navigate to Documents, Smart Mobile Projects and make a copy of the snippets.xml file (in another folder). Restore it after the installation.

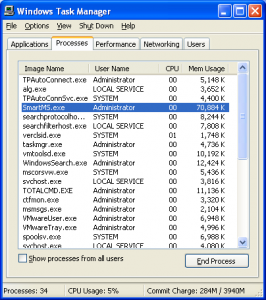
Before the installation you should check that SmartMS.exe process is not present in the memory. Due to a bug in the 1.1.1 version, closing Smart Mobile Studio sometimes left SmartMS.exe process active in memory and that would prevent the new version from being installed. Just run Task Manager and kill any SmartMS.exe you can find (or reboot the computer, that would also work).

SmartMS

If you are upgrading an existing installation, please run Tools, Rebuild RTL Index the first time you start Smart Mobile Studio. This should be done automatically on the first run but we made a mistake preparing the installer and this step is skipped. It will be fixed in the real 1.1.2 release.

Changes

The focus of this release was mainly on fixing old bugs and making everying run smooth. We did, however, add some useful new features.

As you’ll probably notice looking at the changelist below, we didn’t fix most of the problems with the form designer. The reason for this is that we’re working on a completely new designer which will be included in the 1.2 release (expected to be released in autumn).

Compiler

New functionality

  • Compiler now supports the “in” operator to check if a string contains another string.
  • Added a bunch of built-in helpers/aliases for types String, Integer, Float and Boolean. (Full list can be found in the DWScript documentation.)
  • Helpers can operate directly on in-line constants. For example, now you can write “hello”.Reverse (which would return “olleh”).
  • “For in” syntax can be used on variants (for var s in someVariant do …). This allows enumerating members of a raw JavaScript objects.
  • “For in” syntax can be used on sets (for var el in someSet do …).
  • Dynamic arrays now have a “sort” method which takes a comparison function; that maps directly to JavaScript array sort method. String, Integer and Float arrays also implement a “sort” method without a parameter which sorts the array in the natural order.
  • Dynamic arrays now have a “map” method which maps directly to the JavaScript map method.
  • Conditional compilation symbol DWSCRIPT is always defined.
  • Added CompilerVersion constant. It holds a floating point value that holds the compiler version in language terms under the form YYYYMMDD.XX, with XX the minor version. This will be updated each time the language changes.
  • Added ability to mark all named types as deprecated (just postfix with deprecated “optional message”), this means among other things that (unlike in Delphi) classes and records can be marked as deprecated.
  • Added limited support for sets.
    • Only sets of enumerations are supported.
    • Only in operator is supported.
    • Compiler supports Include and Exclude methods, which can be used in two ways, either as “Include(mySet, value)” or as “mySet.Include(value)”.

Improved functionality

  • Better code completion hints on array elements.
  • Functions and methods can be marked inline. This is implemented only for Delphi compatibility; inline is ignored in the compiler.
  • “For x in string” loops now accept “break” and “continue” statements.

RTL

New functionality

  • Unhandled exceptions in console applications are caught and logged to the console window.
  • Added w3_prompt function which maps to the JavaScript prompt command.

Improved functionality

  • W3Effects unit supports FireFox.

Bugs fixed

  • A toolbar button glyph is displayed even if the button caption is empty.
  • TW3CustomStorage.getKeyInt tries to convert string data back to the integer form; only if that fails it returns the default value.
  • TW3Label appearance changes when it is disabled.
  • TW3CheckBox is fully disabled when the Enabled property is set to False.

IDE

New functionality

  • Forms and units can be stored in external files by default (Preferences, Store new forms and units in external files).
  • Position and size of the Smart Mobile Studio is remembered between sessions.
  • Open tabs, editor bookmarks and active tab are stored in the project (.opp) file and are restored when the project is open.
  • Project file (.opp) uses CDATA for form/unit storage to be more version control-friendly.
  • When a file is modified outside the Smart Mobile Studio environment, a prompt will ask the user to reload the file. A built-in “difference” engine can be used to show changes between the editor and disk file. External program (such as WinMerge or Beyond Compare) can be configured and used instead of the internal one.

Improved functionality

  • When a built-in server is used to serve the application files, address in the Serving link can be changed to any of computer’s internal addresses.
  • Name of the open project is shown in the window title.
  • Screen resolution list in Preferences, Layout can be sorted manually.
  • Units and forms can be deleted from the project by pressing the Del key when a unit/form node is selected in the Project Browser.
  • Ctrl+Click on an identifier jumps to the beginning of the row.
  • Ctrl+Click on an identifier scrolls the target to the middle of the screen.
  • Better performance when many JavaScript messages are logged to the console log window in the integrated browser.
  • Add Form/Add Unit commands prompt for the new form/unit name.
  • Search centers the result in the text editor.
  • Ctrl+/ removes comment markers that are preceeded by whitespace.
  • Scroll past EOF setting is enabled on a new install.
  • Improved highlighter configuration. All elements (strings, numbers, reserved words …) can now be configured separately for different file types (pascal, javascript …). Highlighter settings can be stored in a file.
  • New examples.

Bugs fixed

  • Edited data is not lost anymore if you click on the form designer while editing data in the property inspector.
  • A text containing single quotes can be now entered into the Caption and Text properties in the property inspector.
  • Right-clicking in the project browser works as expected.
  • Shortcuts (Ctrl+C, Ctrl+X, Ctrl+V, Del) on the Design tab are now working correctly.
  • Form and unit renaming corrected.
  • Del key works in the Search & Replace dialog.
  • Search & Replace works correctly when Case-sensitive checkbox is not checked and the found text doesn’t match case-sensitively.

—
Sincerely,
Primož Gabrijelčič, product manager

beta release Smart Mobile Studio

Playing with the design

Posted on 03.06.2013 by Jørn E. Angeltveit Posted in Developers log, Documentation, News

There was a question about “adjusting the background color of a form” a while ago. There are actually several ways to adjust the background color of a form, and one should know how Smart works on this area to be able to give the app you’re working on a visual face lift.
Since the various methods might interfere with each-other, it’s important to know the dependencies between the various methods. For example, if you set color by code in the OnCreate method, this will ignore the color in the Object Inspector…

I’ll go trough the various methods by using the classical “Calc (by Eric Grange)” demo in the Demos folder.
Continue reading→

CSS design forms how-to tutorial

Creating a progress indicator

Posted on 23.05.2012 by Jon Lennart Posted in Documentation

One of the things we did not have time to add for version 1.0 is a simple, graphical progress indicator. These are components we regard as standard in the world of delphi or freepascal – so it really should have been added. But, due to the nature of the VJL it’s very simple to make one. And in this little post I will show you how.

It is important to recognize that under smart, while we are striving to create a truly visual design environment (which is right now only at it’s very beginning), you are expected to write your own components. Writing a mobile application under monotouch (c#) or objective C would likewise demand that you write controls, and indeed – if you want your app to be unique then you must take the plunge. But under smart you only have to worry about a fraction of variables opposed to a delphi component. So let’s get cracking.

Chose your ancestors wisely

Beneath the nice object pascal surface, you are really programming the document object model. As such, all components are in reality html tags which are created and inserted “on the fly” when you create a control (or, when you constructor is called). With the advent of HTML5 the browser suddenly got a new type of tag that is different from all the rest, and that is the canvas tag. The canvas tag means you can define a square region and draw the content yourself via a canvas. So it’s pretty close to what we delphi developers have worked with for over a decade.

We have wrapped and isolated this special tag in the base control TW3GraphicControl. What you get with this control is that it automatically created a canvas tag and also updates the size and proportion of that surface should you alter the width or height properties. This is also where the paint() and invalidate() methods come into play.

Here is the complete unit of a very, very basic progress bar. Another way to do it would be to use TW3CustomControl as the base, and then have a child control inside it that you size accordingly. That would probably be cooler since you could add an animated background to it so it looks more “alive”.

Voila! Le "progress" magnifique!

Voila! Le "progress" magnifique!

unit w3progress;

interface

uses w3system, w3graphics, w3components;

type

TW3ProgressBar = Class(TW3GraphicControl)
private
  FMax:     Integer;
  FPos:     Integer;
  Procedure setmax(aValue:Integer);
  procedure setpos(aValue:Integer);
protected
  procedure Paint;Override;
public
  property  Max:Integer read FMax write setMax;
  property  Position:Integer read Fpos write setpos;
End;

Implementation

Procedure TW3ProgressBar.setmax(aValue:Integer);
Begin
  if aValue <> FMax then
  begin
    FMax:=TInteger.EnsureRange(aValue,0,MAX_INT);
    if Fpos > FMax then
    FPos:=FMax;
    Invalidate;
  end;
end;

procedure TW3ProgressBar.setpos(aValue:Integer);
begin
  if aValue <> FPos then
  begin
    FPos:=TInteger.EnsureRange(aValue,0,FMax);
    Invalidate;
  end;
end;

procedure TW3ProgressBar.Paint;
var
  mRect:  TRect;
  mFill:  TRect;
  mPercent: Integer;
  mpixels:  Integer;
Begin
  // make clientrect
  mRect:=TRect.Create(0,0,Width,Height);

  //Clear background with random color
  canvas.fillstyle:=ColorToWebStr(clWhite);
  canvas.fillRect(mRect);

  //calculate totals to percent, and percent to pixels
  mFill:=mRect;
  mPercent:=TInteger.PercentOfValue(FPos,FMax);
  mPixels:=Round(Width * mPercent / 100.0);
  mFill.Right:=mPixels;
  inc(mFill.Right, mFill.Left);

  // fill in gauge region
  canvas.fillstyle:=ColorToWebStr(clGreen);
  canvas.fillRect(mFill);

  //show percent
  canvas.font:='10pt verdana';
  canvas.FillStyle:='rgb(255,0,0)';
  canvas.FillTextF(IntToStr(mPercent) + ' %',
  width div 2,(Height div 2) + 4,MAX_INT);
end;

end.

Using the control in your own projects

First, add a new unit to your project, then copy and paste in the code above. Now go back to your form unit, and make sure you add w3progress to the uses clause. Then you can do something like this:

// Add this to your forms private section
FMyProgress: TW3ProgressBar

// add this to your form InitializeObject method
FMyProgress:=TW3Progressbar.Create(self);
FMyprogress.setBounds(10,10,100,32);
FMyprogress.max:=300;
FMyprogress.position:=128;

Keyboard events, how to?

Posted on 03.04.2012 by Jon Lennart Posted in Developers log, Documentation

Smart supports normal keyboard events for all HTML elements that triggers them. It can be confusing since we bolted the events into TW3CustomControl – which gives the impression that you can catch events from everything. Sadly this is not the case (support varies between browsers – and there is the technicality of “setfocus” which is not consistent under browsers. A native call to alert for instance, breaks the focus cycle that we take for granted in native applications).

I wanted to share how you can hook into the global keyboard event chain of the window object. This is of-course a must for games and multimedia designed for the desktop rather than touch devices. You also want to catch and buffer the key-presses to make your games respond as quickly as possible.

In this example we are going to setup the event handler inside a form. If you use multiple forms in your app but want to isolate keyboard handling handling on a global scale, then you should move this code to your application class rather than the form. Either way, here is how you can do it:

[sourcecode language=”delphi”]

// We start off by binding our handler to the event.
// In this case we bind to the window handle.
Procedure TForm1.InitializeObject;
Begin
inherited;
{$I ‘Form1:impl’}
w3_Bind2(browserapi.getwindow,’onkeydown’,doKeyDown);
End;

// Here we catch the JS event, extract the event value we want
// And ship it off to our handler. In a game, I would handle the
// key here since the extra call adds overhead. Every CPU cycle
// counts in the world of HTML5 programming.
Procedure TForm1.doKeyDown;
var
mCode: Integer;
begin
asm
@mCode = event.keyCode;
end;
HandleKeyDown(self,mCode);

(* As an alternative, you can also access JS objects via a variant,
which is a neat way of getting access to the native JS object
directly:

var
mEvent: variant;
Begin
asm @mEvent = event; end;
case mEvent.keyCode of
//do your thing here
end;
end;
*)
end;

// This is basically the standard onKeyDown event handler that
// all Smart components have. But by rule only input elements
// actually bouble this event. So for games and fullscreen apps
// it makes sense to centralize handling in one place.
procedure TForm1.HandleKeyDown(Sender:TObject;aKeyCode:Integer);
begin
writeln(aKeyCode);
end;
[/sourcecode]

If you want the other events, like onKeyPress – simply look at how TW3CustomControl does it (w3components.pas unit). All event handling methods are prefixed with CB (callback). Just copy the code into your form or app unit and adapt it. The keyboard events will be added to TW3CustomApplication in the next release.

event how-to keyboard

2d tile drawing for game programmers

Posted on 01.04.2012 by Jon Lennart Posted in Developers log, Documentation 2 Comments

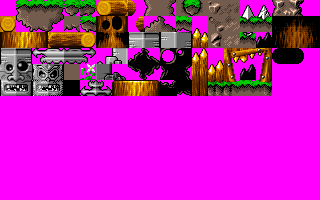
The following is a class that allows you to draw game tile graphics easily. A game tile is basically just a small chunk of graphics (typically 16×16 or 32×32 pixels in size) that you use to display game maps. Typical examples are the older Super Mario games from Nintendo, or the Sega megadrive Sonic games.

Here is an example of a tile-set which you can use (the tileset below is public domain)

A classical 16x16 tileset

A classical 16x16 tileset

And here is the class you can use to draw the tiles

[sourcecode language=”delphi”]
unit SpriteSheet;

interface

uses w3ctrls, w3graphics, w3System;

type

TW3SpriteSheet = Class(TObject)
private
FImage: TW3Image;
FReady: Boolean;
FColumns: Integer;
FRows: Integer;
FTotal: Integer;
FWidth: Integer;
FHeight: Integer;

procedure HandleImageReady(sender:TObject);
Procedure setWidth(aValue:Integer);
procedure setheight(aValue:Integer);
Procedure ReCalcInfo;

public
Constructor Create;virtual;
destructor Destroy;Override;

Procedure LoadImage(aUrl:String);
Procedure Draw(Canvas:TW3Canvas;dx,dy:Integer;FrameIndex:Integer);

Property SpriteWidth:Integer read FWidth write setWidth;
Property SpriteHeight:Integer read FHeight write setHeight;
Property Ready:Boolean read FReady;
End;

implementation

Constructor TW3SpriteSheet.Create;
Begin
inherited Create;
FImage:=TW3Image.Create(NIL);
FImage.OnLoad:=HandleImageReady;
FWidth:=32;
FHeight:=32;
end;

destructor TW3SpriteSheet.Destroy;
Begin
FImage.onLoad:=NIL;
FImage.free;
inherited;
end;

Procedure TW3SpriteSheet.setWidth(aValue:Integer);
Begin
FWidth:=Max(aValue,4);
ReCalcInfo;
end;

procedure TW3SpriteSheet.setheight(aValue:Integer);
Begin
FHeight:=Max(aValue,4);
ReCalcInfo;
end;

Procedure TW3SpriteSheet.ReCalcInfo;
var
img : Variant;
Begin
if FReady then Begin
img:=ObjToVariant(FImage.TagRef);
FColumns:=(img.width+1) div FWidth;
FRows:=(img.height+1) div FHeight;
FTotal:=FColumns * FRows;
end else Begin
FColumns:=0;
FRows:=0;
FTotal:=0;
end;
end;

procedure TW3SpriteSheet.HandleImageReady(sender:TObject);
Begin
FReady:=True;
ReCalcInfo;
end;

Procedure TW3SpriteSheet.LoadImage(aUrl:String);
Begin
FReady:=False;
ReCalcInfo;
FImage.LoadFromUrl(aUrl);
end;

Procedure TW3SpriteSheet.Draw(Canvas:TW3Canvas;
dx,dy:Integer;FrameIndex:Integer);
var
sx,sy: Integer;
Begin
if FReady then
Begin
sx:=FrameIndex mod FColumns;
sy:=FrameIndex div FRows;
Canvas.DrawImageF(ObjToVariant(FImage.TagRef),
sx*SpriteWidth, sy*SpriteHeight,
SpriteWidth, SpriteHeight,
dx, dy, SpriteWidth, SpriteHeight);
end;
end;

[/sourcecode]

In our next installment I’ll give you some examples of how to use it

Debugging smart apps on your mac

Posted on 20.03.2012 by Jon Lennart Posted in Developers log, Documentation

If you happen to own a Mac computer, there is a cool trick i can teach you to make better Smart Mobile applications. It’s also a trick which can benefit native development. In short: the iPhone emulator that ships with Apple’s SDK have many hidden aspects and parameters. One of the most useful is an option to highlight GUI elements that iOS have marked for the GPU. This is a really cool feature and very helpful for both Firemonkey, C#, C++, FreePascal and (drumroll) Javascript apps.

Detecting hardware acceleration

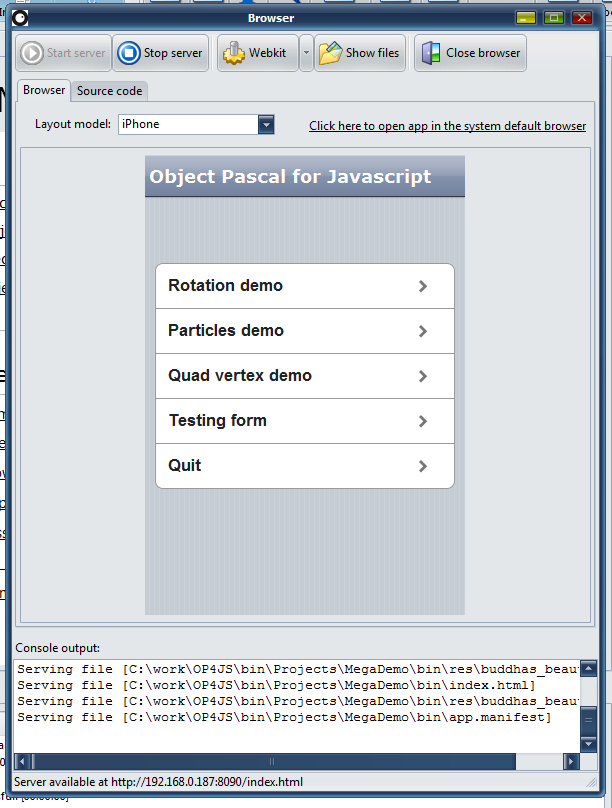
First, make sure the Smart IDE is set to use the built-in server. Now simply load in a project (one of the demos for instance) and execute the application. The server window appears and displays the full URL of your app.

Smart running inside VMWare on a Mac

Smart running inside VMWare on a Mac

Second, go to your Mac and open up a new terminal window. The terminal is more or less what we call a command-line prompt under Windows. On the Mac the terminal is located at “/Applications/Utilities/Terminal”.

In the terminal window punch in the following to start the iPhone emulator with the “magic” setting:

[sourcecode language=”bash”]
CA_COLOR_OPAQUE=1 /Developer/Platforms/iPhoneSimulator.platform/Developer/Applications/iPhone\ Simulator.app/Contents/MacOS/iPhone\ Simulator
[/sourcecode]

Note: The above should be a single line of text. Remove any formatting before pasting it into the terminal.

Punch in the commands and hit enter

Punch in the commands and hit enter

The iPhone emulator should now start up and you will notice that there is a red-tint covering different GUI elements. The elements which have a red tint are those marked for hardware acceleration.

Watching Smart go

Next, click on the safari icon to start Safari Mobile, and when loaded – punch in the URL to your running Smart application. Hit enter and wait for the application to load.

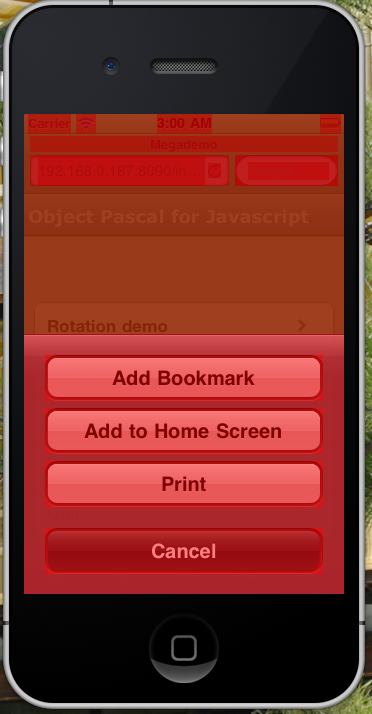
Once your app is safely running inside the iOS emulator, click the shortcut button and select “Add to home screen”. All Smart apps can run in full-screen directly from the iPhone screen – we don’t want to waste 30% of the screen on Safari.

Add the app to the home screen

Everything is HW accelerated here

Now you can start the app directly from the iPhone screen – and you can clearly see which components in your Smart app that uses hardware acceleration. It is also worth noting that elements turn red when they are cached and handled by the GPU. In our case the Buddha below does not turn red until you click the “spin the Buddha” button.

Click the button and hardware rotation takes over

Click the button and hardware rotation takes over

Marking your own controls

If you want to ensure that a custom control (or indeed, any TW3CustomControl descendant) makes use of hardware acceleration, there are two ways of achieving it. Both do the same thing and simply hints to the browser that it needs to cache the element in video memory rather than casual memory:

You can add the following to the control’s CSS:

[sourcecode language=”css”]
-webkit-transform: translateZ(0);
[/sourcecode]

Or, you can set the property directly in your code. Preferably by overriding the StyleTagObject method:

[sourcecode language=”delphi”]
Procedure TMyControl.StyleTagObject;
Begin
inherited;
w3_setStyle(tagRef,’webkitTransform’,’translateZ(0)’);
end;
[/sourcecode]

debugging how-to tips & tricks

Bling up your apps

Posted on 18.02.2012 by Jon Lennart Posted in Documentation 2 Comments

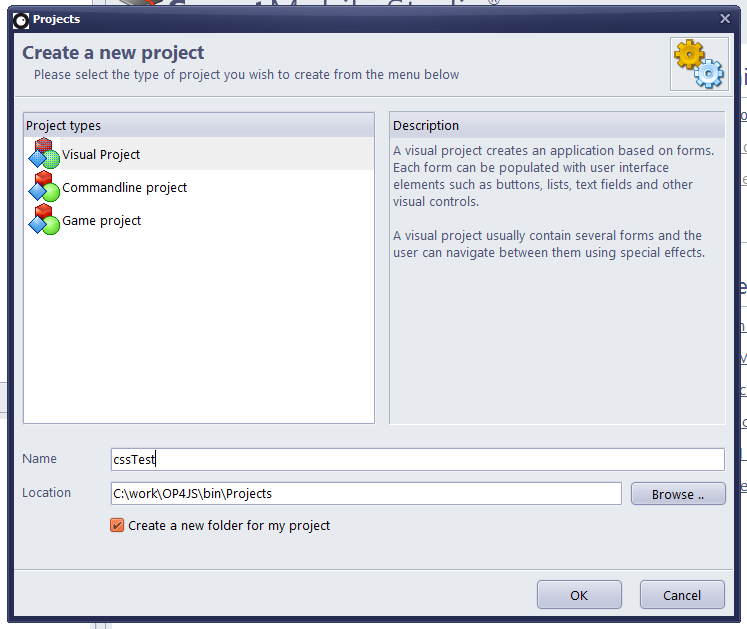
Today we are going to visit the wonderful world of webkit animations. I’m going to demonstrate how you can use relatively simple CSS animations to bring your application to life. So start up Smart Mobile Studio and let’s get cracking! We begin by creating a brand new visual project. This is because we want to make use of visual controls rather than drawing stuff directly to the screen ourselves. So start by creating clicking on the “New project” button and fill in a suitable name.

Remember to select the right project type

Remember to select the right project type

Editing the CSS is easy

Editing the CSS is easy

Setting up the animation

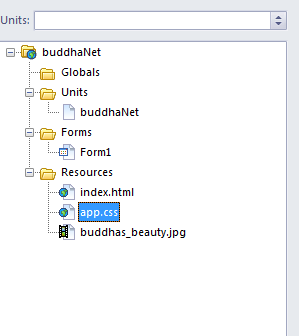
Next step is to define the actual animation. This requires some knowledge of CSS but to be honest, it’s very easy and you will find tons of examples and pre-defined effects online. To define our animation first double-click on the “app.css” file in the project treeview. The file opens and you can edit the CSS.

Note: if you are having problems understanding CSS or lack the inspiration to come up with something unique – a great place to find ready made snippets to use is over at CSS Tricks. This is an awsome website with examples for pretty much every effect under the sun. So it’s well worth the visit.

So now comes the fun part – namely: what sort of animation do we want to create? Well, when my app starts I want it to load a picture and then quickly fade this picture into view. I also want it to scale from very small to normal size. This effect sort of comes at you out of nowhere, so a fitting name is “in your face”. So let’s define the animation:

@-webkit-keyframes InYourFace {
  0% {
    opacity: 0.1;
    -webkit-transform: scale(0.1);
  }
  100% {
    opacity: 1.0;
    -webkit-transform: scale(1.0);
  }
}

As you can see above the animation is defined in C style, using curly brackets. It has two sections, one called 0% and another called 100%. These two sections basically represent the state of the object from beginning to end. You can also add as many sections as you like, in which case the sections become “key frames” (hence the tagname). How fast the keyframes play out depends on the duration property you set (see sourcecode example below). So in the CSS above we animate both the opacity of the object from barely visible to normal visibility, and also the scale of the object from 0.1 to 1.0 (which is the same as 100%).

Setting up the animation code

Next, we are going to need a picture to play with, so i’ve added a picture to my project (Buddhas_beauty.jpg), just find a picture that you want to play around with and add it to the project. You do this by right-clicking on the resources node in the project treeview, clicking “add resource file” from the pop-up menu.

Next, double-click on the file “form1”, which brings up the object pascal code for your form. This form is automatically created by the IDE for you – so you dont need to write it all yourself. We will be adding an image and an animation player object. We will also override a couple of methods to trigger the animation at the right time. Here is the interface section of our form:

  TForm1=class(TW3form)
  private
   { Private methods }
    FImage:   TW3Image;
    FAnim:    TW3NamedAnimation;
    Procedure HandleImageLoaded(Sender:TObject);
  protected
    { Protected methods }
    Procedure InitializeObject;override;
    Procedure FinalizeObject;override;
    Procedure StyleTagObject;override;
    Procedure ReSize;override;
  end;

In the constructor (InitializeObject) we setup the objects we want to use. This is more or less identical to ordinary Delphi, except for the names of-course which has been obscured to protect the binary otherwise located (that was a joke).

  Procedure TForm1.InitializeObject;
  Begin
    inherited;
    (* setup the image *)
    FImage:=TW3Image.Create(self);
    FImage.Visible:=False;
    FImage.OnLoad:=HandleImageLoaded;
    FImage.LoadFromURL('/res/buddhas_beauty.jpg');

    (* setup the effect for our image *)
    FAnim:=TW3NamedAnimation.Create;

    (* and tell the object the CSS name *)
    FAnim.AnimName:='InYourFace';
  End;

  Procedure TForm1.FinalizeObject;
  Begin
    FImage.free;
    FAnim.free;
    inherited;
  End;

Since Javascript is “non blocking” we have to use events to know when a picture has loaded. So to make it short – that’s when we want to trigger our animation. If we tried it before the image was ready we would get an error (or, depending on the object state, nothing would happen).

  Procedure TForm1.HandleImageLoaded(Sender:TObject);
  Begin
    (* image is loaded, now start the effect & make it visible *)
    FAnim.Duration:=0.2;
    FAnim.Execute(FImage);
    FImage.Visible:=True;
  end;

The rest of the code is fairly self describing, especially if you have been following our other examples. The rules are simple: position your controls in the resize method and set styles in the StyleTagObject method. Some rules can be broken and others bent – but these are the ground rules for the VJL.

  Procedure TForm1.StyleTagObject;
  Begin
    inherited;
    StyleClass:='TW3CustomForm';
  End;

  Procedure TForm1.ReSize;
  Begin
    inherited;
    (* position image *)
    FImage.setBounds(10,10,width-20,height-20);
  end;

Another way to trigger an animation on an object is to go low-level. You can for instance run an animation forever using a simple style call as such:

w3_setStyle(FHeader.TagRef,'-webkit-animation',
'TitleGrow 1s infinite alternate');

The above code will execute an animation called “titlegrow” forever. But ofcourse you lose the high level benefits of a pascal interface and also no event callbacks. But if you just want something to move up and down, or some other transformation – then the above one-liner will do the trick.

The final result

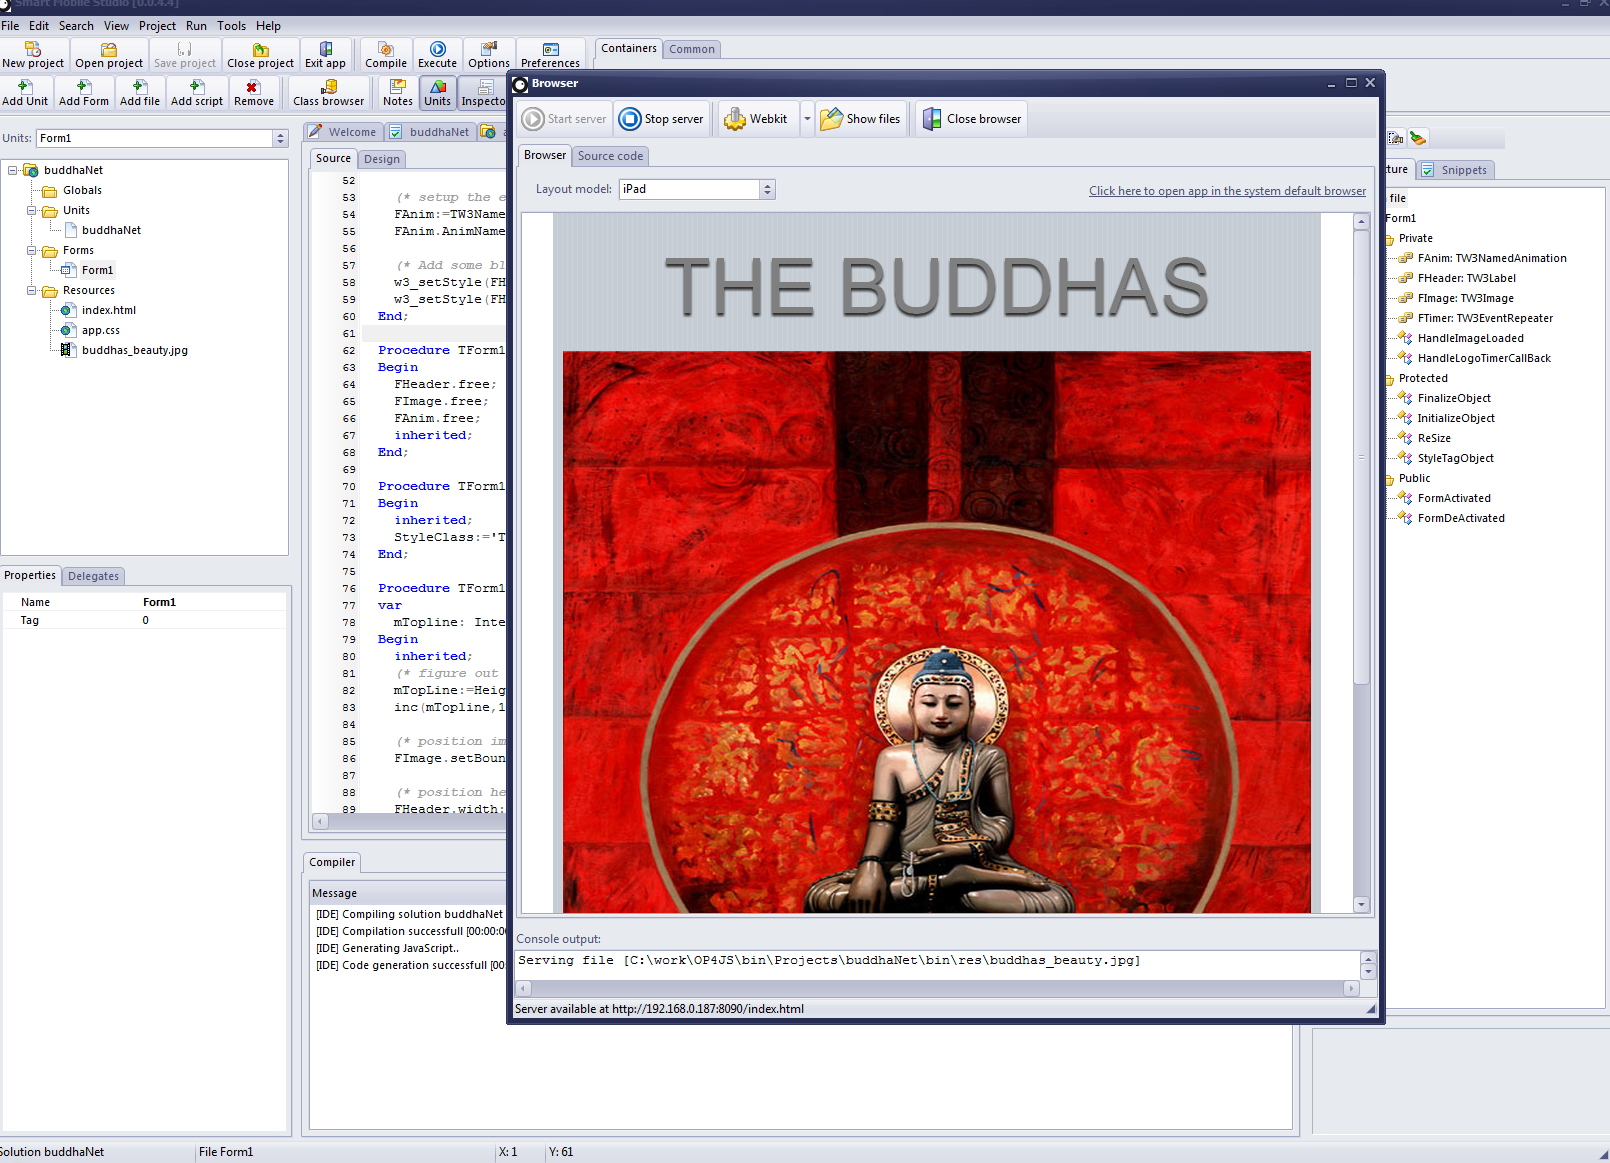
Sadly I cant show you a video of the output, but it works just as expected. The application executes, loads the picture – and when the picture is loaded it scales at you out of nowhere into full size (I later added a label to the top of the display). Click here to download the project

Animations are super easy

Animations are super easy

Here is the same app running in iPad mode. I added some simple resize code to make the font scale with the size of the display. Not bad for less than 5 minutes of coding! Put that in your pipe and smoke it Macromedia 😉

iPad galore, anyone for an e-book?

iPad galore, anyone for an e-book? Click for full size image

animation CSS tutorial

Pages

  • About
  • Feature Matrix
  • Forums
  • News
  • Release History
  • Download
  • Showcases
    • The Smart Contest 2013, Round 1 – Graphics
  • Store
  • Documentation
    • Creating your own controls
    • Debugging, exceptions and error handling
    • Differences between Delphi and Smart
    • Get the book
    • Getting started
      • Introduction
      • Local storage, session storage and global storage
      • Application architecture
      • The application object
      • Forms and navigation
      • Message dialogs
      • pmSmart Box Model
      • Themes and styles
    • Layout manager
    • Networking
      • Loading files
      • TW3HttpRequest
      • TW3JSONP
    • Prerequisites
    • Real data, talking to sqLite
    • System requirements
    • Project types
      • Visual project
      • Game project
      • Console project

Archives

  • December 2019
  • December 2018
  • November 2018
  • July 2018
  • June 2018
  • February 2018
  • September 2017
  • April 2017
  • November 2016
  • October 2016
  • September 2016
  • April 2016
  • March 2016
  • January 2016
  • October 2015
  • September 2015
  • July 2015
  • April 2015
  • January 2015
  • December 2014
  • October 2014
  • September 2014
  • August 2014
  • July 2014
  • June 2014
  • March 2014
  • February 2014
  • January 2014
  • December 2013
  • November 2013
  • October 2013
  • August 2013
  • July 2013
  • June 2013
  • May 2013
  • April 2013
  • March 2013
  • February 2013
  • January 2013
  • December 2012
  • November 2012
  • August 2012
  • July 2012
  • June 2012
  • May 2012
  • April 2012
  • March 2012
  • February 2012
  • January 2012
  • November 2011
  • October 2011
  • September 2011

Categories

  • Announcements (25)
  • Developers log (119)
  • Documentation (26)
  • News (104)
  • News and articles (16)

WordPress

  • Register
  • Log in
  • WordPress

Subscribe

  • Entries (RSS)
  • Comments (RSS)
  • 1
  • 2
  • Next
© Optimale Systemer AS