Smart Mobile Studio
  • News
  • Forums
  • Download
  • Store
  • Showcases
    • Featured demos
    • The Smart Contest 2013, Round 1 – Graphics
  • Documentation
    • Get the book
    • System requirements
    • Prerequisites
    • Getting started
      • Introduction
      • Application architecture
      • The application object
      • Forms and navigation
      • Message dialogs
      • Themes and styles
    • Project types
      • Visual project
      • Game project
      • Console project
    • Layout manager
    • Networking
      • TW3HttpRequest
      • TW3JSONP
      • Loading files
  • About

Tag Archives: graphics

Smart Contest 2013 – Round #1

Posted on 01.02.2013 by Smart Mobile Studio Team Posted in Developers log, News

February is upon us and so is our announced graphics competition! This is the first competition out of four this year. So this is your chance to win some exciting prices by showing off your Object Pascal skills!

The topic of this round is: graphics programming (eg. demo-scene, fractal art, visualizations etc).

The rules are as follows:

  • Registration before the 10th of February (registration at contest@smartmobilestudio.com)
  • Deliver your contribution before 1st of March
  • Games are not accepted this round (that’s scheduled for a later date)
  • User interaction is allowed (but not mandatory)
  • Porting of retro demos is allowed (providing it is a clean rewrite)
  • JavaScript snippets are allowed (within limits)

Fractal art

Fractal art

Demos

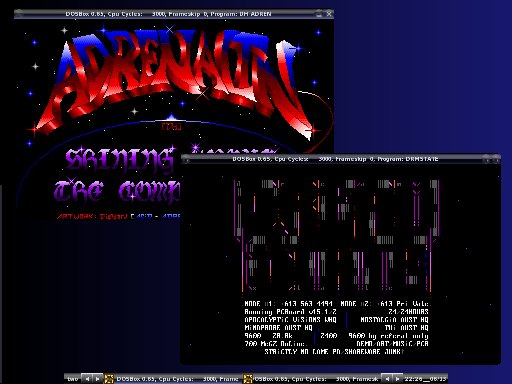
Demoscene

Prizes

First prize is a tablet device of your own choice (up to USD 750). So have your pick between

  • iPhone
  • iPad
  • iPad mini
  • Windows Tablet
  • Windows phone
  • Android tablet or phone

Judges

Primož Gabrijelčič

Developer of the popular omnithread library, author of the Smart Mobile Studio Bible, contributor to the Smart Mobile Studio IDE and RTL, and dedicated object pascal speaker and innovator

Christian Budde

Developer of various open source projects. Among these, the popular Delphi ASIO & VST Project for professional audio related development. Another focus of his work is Graphics, which is reflected in projects such as the modernized AggPas implementation, an independent object pascal png library and a native object pascal interface to TrueType fonts (called PascalType). He is also contributor and maintainer of  Graphics32.

Currently he is working on the Smart Mobile Studio IDE and RTL.

Delivery

All contributions must be delivered in full source and binary with no missing pieces. The project must compile on the current version of Smart Mobile Studio (1.1 branch).

Happy coding!

Android announcement Apple competition delphi demo graphics iPad javascript Object Pascal OP4JS Prices Smart Contest 2013 Smart Mobile Studio Windows Tablet

Smart Graphics

Posted on 24.01.2013 by Jon Lennart Posted in Developers log, News

Every Delphi programmer knows how to use the canvas. Its easy, its straight forward and it can be a source of phenomenal frustration if you want to do more than draw straight lines. Good old TCanvas is, despite it’s ease of use, a dinosaur in terms of modern features. The moment you start thinking about anti-aliasing, alpha blending or anything pertaining to rotation – it’s game over for TCanvas.

A smarter canvas

Smart mobile studio implements (or wraps) the HTML5 canvas directly, which means that you have access to all the latest features. The HTML5 canvas was implemented by Apple (webkit codebase) and is the browser equivalent of their Quartz API. This means first of all that it’s a bit trickier to get going, but on the flipside once you master it you can generate some truly amazing graphical effects.

Before we dig into the canvas, i thought it might be best to get up to speed with some of the terminology you are bound to encounter. Some of the concepts are not bound directly to HTML5 but are loosely related to computer programming in general.

Double buffering

Double buffering simply means that you draw your graphics to an offscreen bitmap rather than directly onto the visible canvas. When you are finished drawing you copy (also called “blitting”) the result to the visible display in one fast operation. This technique reduces flickering and makes movement appear smooth. The reason double buffering works is because there is often a delay between your calls – and the actual pixel memory being altered by the CPU/GPU (graphical processing unit). It greatly depends on the kind of hardware you are running, but either way – double buffering is what people do.

On a side note I can mention that Delphi actually uses double buffering by default. If you look up the drawing mechanism for TWinControl you will find that Delphi allocates a new bitmap, draws the control, then copy the result onto the device context. The problem with Delphi is that it allocates a bitmap for each draw, which is extremely slow. Thankfully, we dont have to care about that under Smart Mobile Studio.

Per scene rendering

Under Delphi whenever you use the canvas and call methods like lineto, circle, ellipse etc. these functions are executed “as is”. So once you issue a call to lineTo the underlying WINAPI draws a line into the bitmap your canvas is connected to. This method is very effective, bare bone and does it’s job well. Sadly it is very tricky to create anything modern with this. It’s perfect for 1990’s user interfaces but doesnt cut it for 2013.

HTML5 doesnt really work this way (nor does quartz) because here everything is based on paths. A path is basically just an array of TPoints that you pre-calculate before anything is drawn on screen. So to draw a line you first have to call beginpath, then issue a moveto and lineto command (which we already know under delphi), and finally you draw the line with a call to stroke or endpath. Here is a code snippet from HTML5 Canvas Tutorials:

      canvas.beginPath();
      canvas.moveTo(100, 20);

      // line 1
      canvas.lineTo(200, 160);

      // quadratic curve
      canvas.quadraticCurveTo(230, 200, 250, 120);

      // bezier curve
      canvas.bezierCurveTo(290, -40, 300, 200, 400, 150);

      // line 2
      canvas.lineTo(500, 90);

      canvas.lineWidth := 5;
      canvas.strokeStyle := 'blue';
      canvas.stroke();
Paths are cool

Paths are cool

As you can probably imagine, by automating the variables involved you can really get some amazing results with very little effort. Check out this liquid particles demo for instance (click image):

Nice canvas demo

Nice canvas demo

My personal favorite JavaScript demo has to be: or so they say

Also make sure you check out the graphics demos that ship with Smart Mobile Studio for more inspiration! And remember, the smart canvas maps more or less directly to the HTML5 canvas. We have added a few helper routines to make life easier for pascal programmers (and helper classes) but you will have no problems following a HTML5 JavaScript canvas tutorial with Smart Mobile Studio.

Alpha blending

Alpha blending simply means that you can draw graphics that is semi-transparent. Typically alpha blending is associated with 32bit graphics (RGBA) where each pixel or dot on the display is represented by 4 bytes. The first 3 bytes represents red, green and blue while the last byte defines the opacity of the pixel. When you copy a bitmap onto another which uses opacity as an option, it will merge with the existing graphics rather than overlap with it.

Sprites

In the golden days of 16 bit home computers (Amiga and Atari) the hardware supported sprites. A sprite is basically just a small, transparent picture which game programmers use to display and animate characters. In our day of fast processors and high speed 3d effects – there is no longer hardware support for sprites, but the concept of a “sprite” (as a moving graphical element) is still widely used. So if someone uses the term “sprite” or “bob” (the graphical co-processor in the Amiga was called “the blitter”, hence “blitter object”) you what they are talking about.

Next article

In this first installment we have taken a quick look at related concepts that you are bound to meet when programming graphics. Concepts like double buffering, sprites, alpha blending are universal and are deployed on all platforms regardless of language. So it’s handy to get to know these concepts straight away. We have also introduced how the HTML5 canvas works, that it uses paths rather than ad-hoc, brute force like good old TCanvas.

In the next installment we will dive into Smart Mobile Studio and familiarize ourselves with the API and draw some stuff. We will further look at how each of the above concepts work, things like double buffering, in real-life.

Reference material

  • W3Schools HTML5 canvas tutorial
  • HTML5 path tutorial
  • Liquid particles demo
  • Apple Quartz API documentation
  • Or so they say JS demo
Apple code delphi graphics javascript Object Pascal pixel webkit

The Smart Contest 2013 – Topic for the first round

Posted on 15.01.2013 by Smart Mobile Studio Team Posted in Developers log, News
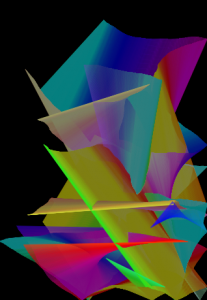
Fractal art created by longan drink.

Fractal art created by longan drink.

As previously announced, we will arrange 4 contests this year with some really cool prizes.

The topic for the first round will be “Graphics”.

We will reveal the details of this round by the end of January, but pay attention to our upcoming blog posts. They will give you lots of inspiration and get you started on the “graphics area” with Smart Mobile Studio.

(To get some inspirations right away, you can click on the image above).

In case you missed it:
First prize in each round will be a tablet (iPad, iPad mini, Android based tablet, Windows tablet). Value ~750 USD


Q: Will it be possible to participate with a trial version of Smart Mobile Studio?
A: Yes. We will even extend your trial period to cover the competition period if that is necessary. 😀


Best regards,
The Smart Mobile Studio Team

announcement graphics Smart Contest 2013

GradLines

Posted on 14.04.2012 by Jørn E. Angeltveit Posted in Developers log
GradLines

GradLines

Christian-W. Budde has already amazed us with two cool classical games (Tetris and Minesweeper), but Christian has still got some other goodies to share with us.  As a member of the Graphics32 libraryteam, he was inspired by the Gradient line example and created a similar solution with Smart.

Nice work, Christian.

Demo and code

You can download the project source code here:  GradLines.zip

You can find an online demo here:  GradLines demo

(Or simply scan the QR code below with your phone)

qrcode

code demo gr32 gradient gradline graphics graphics32 line

Ghost polygon, back to the 90s

Posted on 04.02.2012 by Jon Lennart Posted in Documentation
Spaceballs

Spaceballs

In this little tutorial we are going to take a trip back in time, back to the golden age of personal computing. A time when the ultimate computer was the Commodore Amiga and the latest kid on the block was wire-frame 3d graphics and polygon art. I am of course talking about the 1990’s and the glowing polygon effect.
Continue reading→

graphics tutorial

OP4JS: Happy new year

Posted on 01.01.2012 by Jon Lennart Posted in Developers log

I want to thank everyone that has taken the time to check out the alpha release, and wish everyone a happy new year! Thanks to your help we have a list of roughly 50 reports on things that needs to be fixed or changed – and they will all be addressed asap. Tomorrow the holidays is officially over in Norway and it’s back to work for all of us.

I am also amazed at how many demo’s we have seen already, considering that an Alpha is very much work in progress. Eric Grange knocked out a clone of the retro game missile command (low frame-rate video). On my iPad it runs at 230 frames per second. This is actually to fast to play 🙂 Primoz Gabrijelcic also made a nice fractal explorer as well which can be seen here.

Have a happy new year!

delphi graphics javascript OP4JS

Your first OP4JS custom control

Posted on 05.10.2011 by Jon Lennart Posted in Documentation 1 Comment
There is a lot of work behind OP4JS

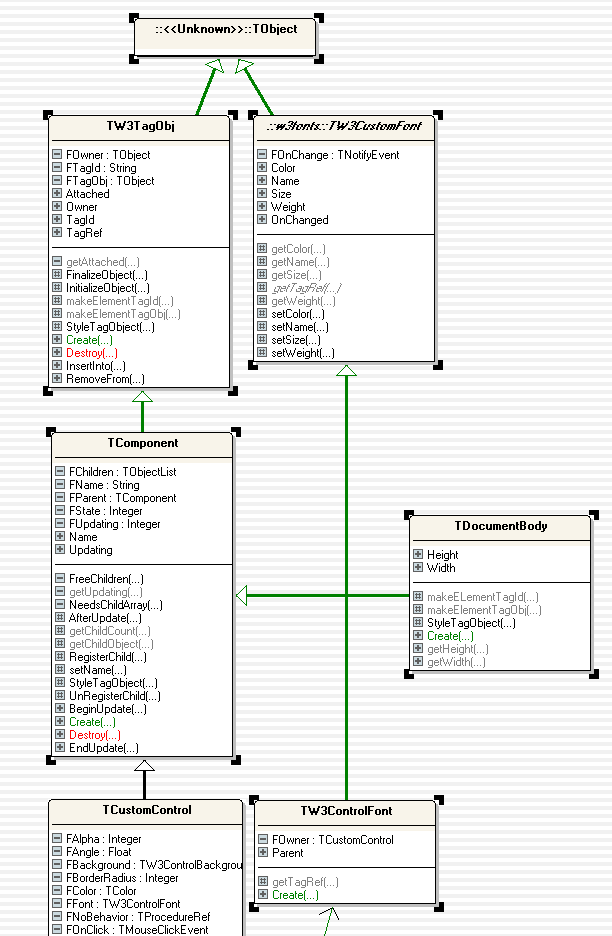
About 0.1% of the total OP4JS RTL system

Since the basic framework is nearing completion at high speed (although some modifications might appear) I thought it could be interesting to demonstrate how to create your very own custom control under OP4JS.

In the Delphi world there are two archetypal programmers: Those that stick to the high level interface of Delphi, meaning that they only use pre-made controls and rarely go beneath the bonnet so to speak – and the second group which create components, packages and love to fiddle around with low-level coding. This type of stereotyping is something more or less unique to RAD languages (which would include Delphi, Lazarus, Visual Basic, Real Basic and languages that are “design” based). In more mature languages like C++, Delphi (yes delphi is just as low level as the C++) or C# low-level work is almost unavoidable. But with Object Pascal you at least have a choice (!)

With OP4JS we have tried to retain much of the HLA (high level abstraction) of Delphi, but the system demands that if you want something unique – you have to create your own controls in order to stand out. If not, you might as well go with the many template-based “app machines” out there that produce programs that all look and feel the same.

The basics of a control

There are two types of controls you can create under OP4JS: Graphical controls and ordinary parent/child controls (like you are used to from Delphi). A graphical control is an object that contains a HTML5 graphics context and canvas, which means you have to draw it yourself. This is good for things like games, charts or anything that cant be represented using “normal” html.

The second type, which is the one 90% of all the standard controls that ship with OP4JS derive from, is TCustomControl. So let’s have a look at how setting up a fancy iPhone header looks like:


type

TW3HeaderControl = Class(TCustomControl)
private
  FLabel:     TLabel;
  FBackBtn:   TW3ToolButton;
  FNextBtn:   TW3ToolButton;
Protected
  Procedure   Resize;Override;
protected
  Procedure   InitializeObject;override;
  Procedure   FinalizeObject;override;
  Procedure   StyleTagObject;override;
End;

Under Delphi you would probably expect to see a constructor and destructor in the above code, but under OP4JS we try to synchronize the number of steps taken to establish a control (i.e number of resize and position operations). So to solve this we have introduced 3 new methods: InitializeObject, FinalizeObject and StyleTagObject. As the names imply you create any sub-controls and initialize your variables in InitializeObject (just think of it as your constructor), you destroy those instances in FinalizeObject, and you apply any extra styling or property alteration in the StyleTagObject method.

Clever styling

When a control is in the state of creation, it automatically set it’s own style class (think html here) to the name of it’s class. So in order to give our little control a nice look – we edit the default style sheet (this is automatically created when you create a new application) and make it look like a true iPhone header. The rule of thumb is: The name of the CSS class always matches the name of the OP4JS control:

.TW3HeaderControl
{
	background-image:-webkit-gradient(linear, left top, left bottom,
		from(#b2bbca),
		color-stop(0.25, #a7b0c3),
		color-stop(0.5, #909cb3),
		color-stop(0.5, #8593ac),
		color-stop(0.75, #7c8ba5),
		to(#73839f));
	border-top: 1px solid #cdd5df;
	border-bottom: 1px solid #2d3642;
	-webkit-box-shadow: rgba(33, 33, 33, 0.2) 0px 1px 1px;
}

Adding behavior

If you don’t know anything about CSS or HTML, don’t worry, you can always copy a style you like from the default skin, and there are plenty of examples around the Internet to learn from (or just get a good book, that would save you a lot of time). OK now we need to add some code to our unit to make it come alive:

Procedure TW3HeaderControl.InitializeObject;
Begin
  inherited;
  FLabel:=TLabel.Create(self);
  FLabel.BorderStyle:=bsDotted;
end;

Procedure TW3HeaderControl.FinalizeObject;
Begin
  FLabel.free;

  if assigned(FBackBtn) then
  FBackBtn.free;

  if assigned(FNextBtn) then
  FNextBtn.free;

  inherited;
end;

Procedure TW3HeaderControl.StyleTagObject;
Begin
  inherited StyleTagObject;
end;

Procedure TW3HeaderControl.Resize;
var
  wd,hd:  Integer;
  mTemp:  Integer;
  dx:     Integer;
Begin
  wd:=Width;
  hd:=Height;

  mTemp:=wd;
  dx:=4;
  dec(mTemp,4); //left margin
  dec(mTemp,4); //Right margin

  if  assigned(FBackBtn)
  and (FBackBtn.Visible) then
  Begin
    //space between "back" & label
    dec(mTemp,FBackBtn.width);
    dec(mTemp,2);

    //offset the left edge of the label
    inc(dx,FBackBtn.Width);
    inc(dx,2);

    // position the back-button
    FBackBtn.Left:=4;
    FBackBtn.Top:=4;
  end;

  if  assigned(FNextBtn)
  and (FNextBtn.Visible) then
  Begin
    //space between label & "next" button
    dec(mTemp,FNextBtn.width);
    dec(mTemp,2);
    FNextBtn.Left:=mTemp;
    FNextBtn.Top:=4;
  end;

  FLabel.left:=dx;
  FLabel.top:=4;
  FLabel.Width:=mTemp;
  FLabel.Height:=Height-8;
end;

Why all that code? First of all because it’s just a quick example and secondly, because a typical iPhone header have 3 parts: A back button, a next button and some text in the middle. The above code checks to see if you actually have created a back or next button and shrinks the text area accordingly. Let’s see how it looks so far:

That was easy enough

That was easy enough

I have set the label to have a dotted frame just to make it easier to work with, we will of-course remove the frame all together later. But now, let’s add some more methods to the class interface. We want to expose the label object to give the user access to it’s full capabilities (caption, font, background, orientation and all the rest), and we also want both back and next buttons.

But, we want to keep resources to a bare minimum, so we will use the old “need” trick and only create the buttons when asked for. So the buttons will only be created when you access them:

TW3HeaderControl = Class(TCustomControl)
private
  FLabel:     TLabel;
  FBackBtn:   TW3ToolButton;
  FNextBtn:   TW3ToolButton;
  procedure   ReleaseButtons;
  Procedure   NeedBackButton;
  Procedure   NeedNextButton;
  function    getBackButton:TW3ToolButton;
  function    getNextButton:TW3ToolButton;
protected
  Procedure   Resize;Override;
protected
  Procedure   InitializeObject;override;
  Procedure   FinalizeObject;override;
  Procedure   StyleTagObject;override;
public
  Property    BackButton:TW3ToolButton read getBackButton;
  Property    NextButton:TW3ToolButton read getNextButton;
  property    Title:TLabel read FLabel;
  Property    Options:TW3HeaderButtonOptions read FOptions write setOptions;
End;

And the implementation for our new methods are (this is just a quick example):

Procedure TW3HeaderControl.NeedBackButton;
Begin
  // Create object on the fly if required
  if not assigned(FBackBtn) then
  Begin
    BeginUpdate;
    FBackBtn:=TW3ToolButton.Create(Self);
    SetReSized;
    EndUpdate;
  end;
end;

Procedure TW3HeaderControl.NeedNextButton;
Begin
  // Create object on the fly if required
  if not assigned(FNextbtn) then
  Begin
    BeginUpdate;
    FNextbtn:=TW3ToolButton.Create(Self);
    SetReSized;
    EndUpdate;
  end;
end;

function TW3HeaderControl.getBackButton:TW3ToolButton;
Begin
  NeedBackButton;
  result:=FBackBtn;
end;

function TW3HeaderControl.getNextButton:TW3ToolButton;
Begin
  NeedNextButton;
  result:=FNextBtn;
end;

procedure TW3HeaderControl.ReleaseButtons;
Begin
  if assigned(FBackBtn) then
  Begin
    FBackBtn.free;
    FBackBtn:=NIL;
  end;

  if assigned(FBackBtn) then
  Begin
    FNextBtn.free;
    FNextBtn:=NIL;
  end;
end;

The final product

To use our new control, all we have to write (in our Form’s InitializeObject for instance) is something like:

FMyCoolHeader:=TW3HeaderControl.Create(self);
FMyCoolHeader.BackButton.Caption:='Back';
FMyCoolHeader.BackButton.onClick:=HandleBackButtonClicked;
FMyCoolHeader.Title.Caption:='My cool header!';

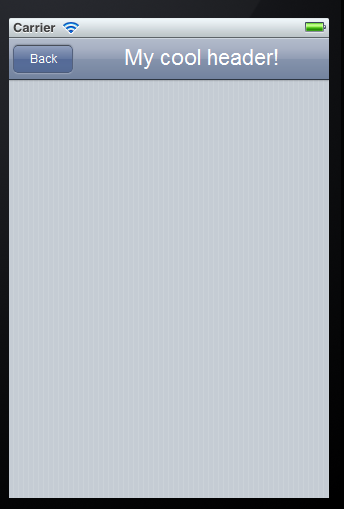
And voila – we have a nifty iPhone header that looks and feels like the real thing 🙂

Easy but effective

Easy but effective

Notes and addendum

This example is very, very simple. It was put together in 5 minutes just to demonstrate how easy it is to get going and is in no-way an example of code quality or approach. I can think of 1000 ways of making a better header control (the one that ships with OP4JS has a lot more code and does not create buttons this way, and yes — exceptions and error handling is a must).

CSS graphics iOS Smart Mobile Studio tutorial

Pages

  • About
  • Feature Matrix
  • Forums
  • News
  • Release History
  • Download
  • Showcases
    • The Smart Contest 2013, Round 1 – Graphics
  • Store
  • Documentation
    • Creating your own controls
    • Debugging, exceptions and error handling
    • Differences between Delphi and Smart
    • Get the book
    • Getting started
      • Introduction
      • Local storage, session storage and global storage
      • Application architecture
      • The application object
      • Forms and navigation
      • Message dialogs
      • pmSmart Box Model
      • Themes and styles
    • Layout manager
    • Networking
      • Loading files
      • TW3HttpRequest
      • TW3JSONP
    • Prerequisites
    • Real data, talking to sqLite
    • System requirements
    • Project types
      • Visual project
      • Game project
      • Console project

Archives

  • December 2019
  • December 2018
  • November 2018
  • July 2018
  • June 2018
  • February 2018
  • September 2017
  • April 2017
  • November 2016
  • October 2016
  • September 2016
  • April 2016
  • March 2016
  • January 2016
  • October 2015
  • September 2015
  • July 2015
  • April 2015
  • January 2015
  • December 2014
  • October 2014
  • September 2014
  • August 2014
  • July 2014
  • June 2014
  • March 2014
  • February 2014
  • January 2014
  • December 2013
  • November 2013
  • October 2013
  • August 2013
  • July 2013
  • June 2013
  • May 2013
  • April 2013
  • March 2013
  • February 2013
  • January 2013
  • December 2012
  • November 2012
  • August 2012
  • July 2012
  • June 2012
  • May 2012
  • April 2012
  • March 2012
  • February 2012
  • January 2012
  • November 2011
  • October 2011
  • September 2011

Categories

  • Announcements (25)
  • Developers log (119)
  • Documentation (26)
  • News (104)
  • News and articles (16)

WordPress

  • Register
  • Log in
  • WordPress

Subscribe

  • Entries (RSS)
  • Comments (RSS)
© Optimale Systemer AS